


Product Description
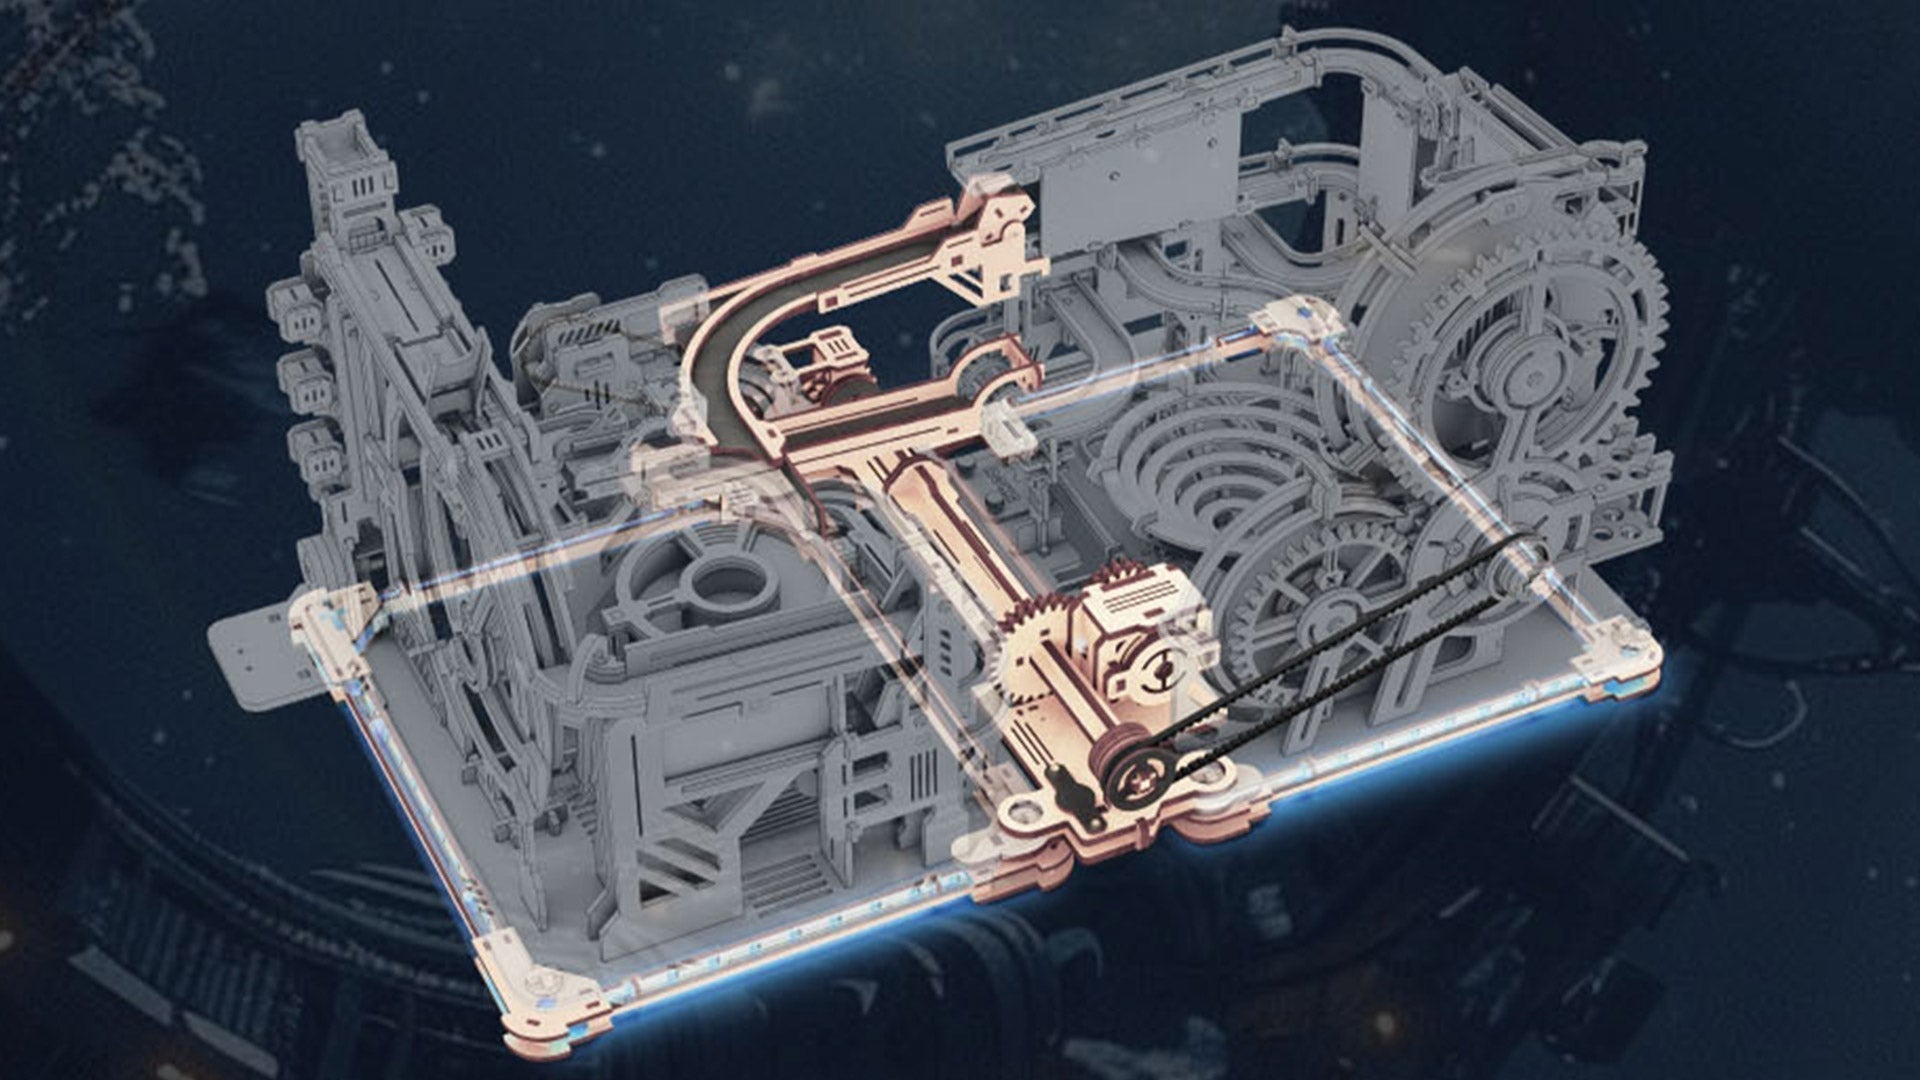
The ROKR Marble Run Link Pack by Robotime presents you with demanding 3D wooden puzzles that combine imagination with skilled construction. This interactive product combines the Marble Spaceport and Marble Night City models into one integrated unit.
Using this link pack enables you to build elaborate marble tracks which result in a superior interactive setup with enhanced visual appeal.
Details
-
Assembly Time: 3h
-
Difficulty Level: ★★★☆☆☆
-
Package Size: 304mm x 228mm x 33mm
-
Assembly Size: 515mm x 303mm x 239mm
-
An instruction manual
-
Package include: sandpaper, screw driver, LED light strips, rod, metal rings, controller board, and rubber belts etc
ROKR Marble Spaceport Marble Run VS ROKR Marble Night City Marble Run
| ROKR Marble Spaceport Marble Run | ROKR Marble Night City Marble Run | |
| Mode | Manual/Electric | Manual ONLY |
| Number of pieces | 472 | 294 |
| Assembly time | 5.5h | 7h |
| Difficulty level | ★★★★☆☆ | ★★★★☆☆ |
| Assembled size | 12.8*8.4*9"(32.5*21.4*22.8cm) | 12.8*8.4*9"(32.5*21.4*22.8cm) |
source: @MartinsAssemblyHaven
How to Assemble the Link Pack
Step 1: Take out the pieces that you will use to make the track transmission shaft.
Step 2: Insert the smaller wooden nuts on the right side and the larger wooden nuts on the left side.

Step 3: Take out the plastic sticker that has an adhesive on the side. The adhesive side of the part should be to the left - on the outside while the other part goes inside.
Step 4: Take the metal rings and place them inside the wooden ring.
Step 5: Place the materials on your table in the order that they will be put into the first big piece you arranged. Then, you put the gear last.
Step 6: Pick up the gray piece and gear and apply wax to integrate them smoothly into the kit. Put them into the track transmission shaft you first assembled.

Step 7: Take off the motor from the spaceport, dismantle it, and put it back together.
Step 8: Remove the yellow handle. You can do this by using the end of the little handy tool to push the handle backward. Unscrew the object through the use of a screwdriver.
Step 9: Remove the motor, which is found at the back of the spaceport. Unplug it carefully, as it is tiny. Use a plier or tiny tweezer to gently wiggle the cable so that it can pull from the motor.
Step 10: Remove some parts from the motor. Start from the top, then remove the front. Handle the cable gently because excessive pressure could damage it. Don’t get rid of anything you have removed.
Step 11: Put the motor back in its place and screw it in. Then, insert two gears into it. Secure the gears together while checking that each gear faces the appropriate direction.
Step 12: Grasp the larger piece next that contains a patterned side and a plain side. Position the patterned section of the wood at the base and maintain the plain side at the top.
Step 13: Connect the motor to the big piece and ensure that the cable runs through one of the holes correctly.

Step 14: Take up the small black box where you connect the motor and the USB and connect it to another piece. Screw the parts but do not overtighten it so you don’t crack the part as it is fragile.
Step 15: Connect the base for the light strips. Push the base down so that it will be flat.

Step 16: Take out your LED light strips. The back of the light is sticky, you need to pull it off gently. The cable of the light strip should be connected to the piece.
Step 17: Insert wooden hooks into the light strip so they won’t pull off.
Step 18: Construct another base using the same steps mentioned above. Some of these parts may have burrs but they can be plucked out or sandpaper.

Step 19: Lay the base on the table, with the cable towards the left-hand side. The second base control cable should direct its path toward the right-hand side. In this way, the two cables are out in the middle. Join up the two square bases.

Step 20: Take up the power supply that you built and put it at the upper back of the square base. The longer leg has to stay on the right-hand side.
Step 21: Take another piece to insert at the lower back of the base.

Placing the Marble Run Night City on the Link Pack
Step 1: Set the night city kit on the table for use. Remove everything at the rear, that is the back leg.
Step 2: Insert wooden screws on the holes that are visible in the leg parts. Put on only two long legs. Then, place it on the base. Check that each corner fits properly into position.
Step 3: Remove the handle. To do this, use a knife and push it gently to take out the pieces.

Step 4: Before you put back the pieces, wax them but apply on the sides only. Don’t use vaseline. Candle wax is preferred.
Step 5: Use a screwdriver to force the components into their proper positions.
Step 6: Lay the remaining pieces on the table and put them into the handle hole. You may need to insert your finger at the back to easily put it in.
The Night City is only hand cranked, which means it can only be activated manually. There is no room for switching modes.
Laying the Marble Run Spaceport on the Link Pack
Step 1: Remove the bottom part of the legs, but don’t get rid of it , just in case.
Step 2: Take the small pieces (labeled a18 and a187) and put them together.
Step 3: Move the spaceport and place it on the base of the link pack.
Step 4: Take the first piece you put together and place it in between the night city and spaceport on the link pack.

Step 5: Make sure the cable doesn’t go into the hole. Use a screw to put it into the link pack with minimal pressure.
The Spaceport has manual and electrical modes. You can switch between these two modes as you prefer. The electrical mode can be activated by connecting a USB Type-C cable.
Installing the Power Distributor
Step 1: Take out the power distributor (or electrical circuit).
Step 2: Raise the link pack upwards and take out the cable. You will observe two tiny holes on it together with two metal prongs that extend from the electrical circuit. The components need to fit properly together.
Step 3: Press the pieces together while making them match up properly. The touch button should go through the left hand side of the link pack. At the top of the link pack, you’ll see two slots, you need to push it back in.
Step 4: Create a little box to protect the electrical circuit. To do this, take up the gray wood pieces and put the parts together. Then, place it over the electrical circuit to cover it.

Step 5: Put the wooden belt into the appropriate piece and place it on the link pack, above the first one you had put there. The wooden belt should be tied to the night city. Try to lock everything in place so that it is secured.
Step 6: Plug your USB cable into the power source.
Step 7: Test run the assembly process. Two balls may try to get into the gear and jam. Check everything to verify proper object connections.
When you push it once, the marble run should turn on. If you hold the button, it should turn everything off.
Place the marbles inside the kit to observe how everything functions.
Reviews
The ROKR Marble Run Link Pack has garnered positive reviews from many users. A YouTube Reviewer mentioned that the kit is affordable and has a nice ground effect. There were no breakages, and you have a lot of excess or spare parts to replace the ones that are thinner.
He further said that some parts may freeze, and you may need to poke the ball if you want it to fall into place.
He raised concerns about lifting the link pack before installing the electrical circuit, but if you can do that part carefully, you’ll have no problem.
Additionally, the kit does not come with wax. Therefore, for parts that need waxing to interact smoothly, you can use alternatives. Wax from candles, crayons, vaseline and beeswax are amongst the common options you can choose from.
Overall, he enjoyed working with Spaceport. Things were easy and straightforward. Night city was not as straightforward as Spaceport because it has many tiny pieces and spaces.
A reviewer from Reddit mentioned that the motor strength isn’t powerful enough. Although the kit maintains a steady operation, it might not perform at the rate you expect. You can solve this by getting a more powerful motor.
Final Thoughts
Overall, the ROKR Marble Run Link Pack is a valuable addition for enthusiasts of marble runs. It connects two models into a single, engaging system, giving it a seamless look. Surprise yourself or your family members with this link pack for a creative experience.
What’s more? Check our amazing and best selling items at Robotime.
FAQs:
Why is my marble run only have manual mode and not electric mode? How can I make it electric?
That's because the marble run you bought doesn't come with an electric mode itself. ROKR Marble Spaceport Marble Run have 2 modes: electric mode and manual mode, ROKR Marble Night City Marble Run only have manual mode.
With ROKR Marble Run Link Pack you can combine these two products into one. By this method you can have a manual and electric mode marble run.
Do gears have to be waxed? Is there any way to make the gear smoother?
-Instead of using wax, you can also use graphite, which many users say is smoother than waxing.
-You can also use industrial gear lubricants.


Robotime Creative Team
As Robotime's earliest audience and testers, they start from user needs and are dedicated to sharing stories and insights about the brand and its products.
Robotime is a creative lifestyle company dedicated to designing and developing 3D puzzles, toys, and wooden handicrafts. Subscribe to learn more.


Leave a comment
This site is protected by hCaptcha and the hCaptcha Privacy Policy and Terms of Service apply.