





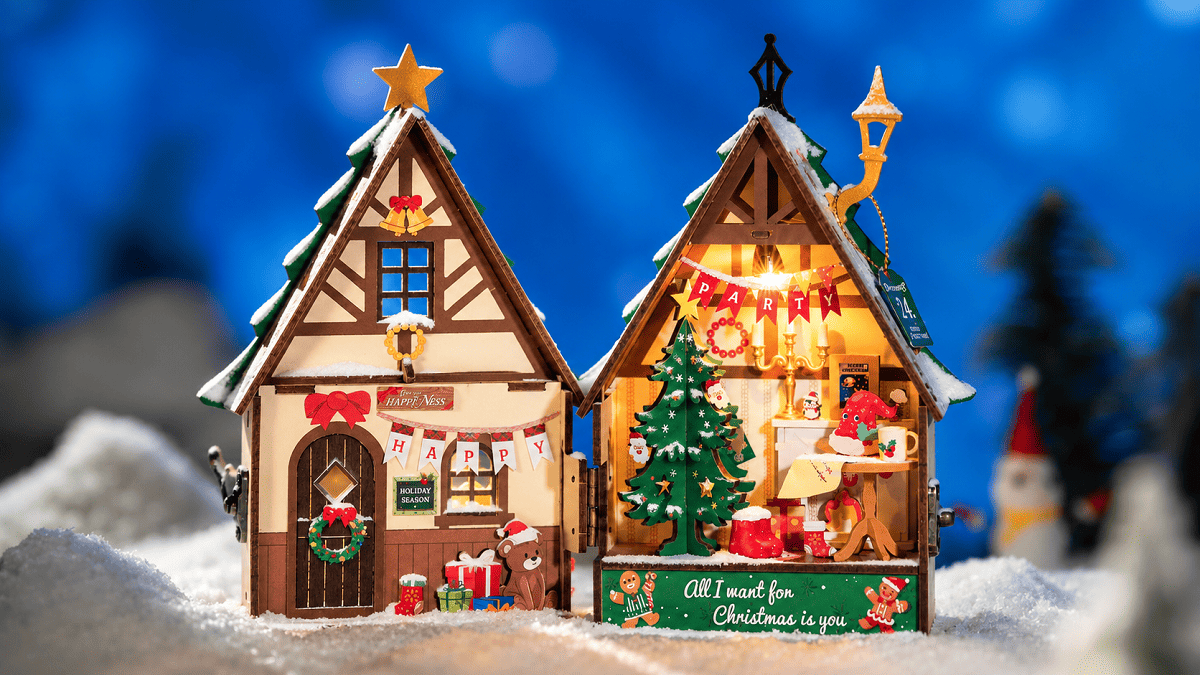
A believable winter miniature does not need perfectly smooth snow. It needs weight, texture, and a sense of where the wind would leave it behind: along a roof edge, around a tree trunk, or in the quiet corners of a path.
Robotime Community makers Tkaplan, Kim Kieffer, and Rukya Alkaabi have each explored a different way to create that effect. Their projects show how decorative snow paste, air-dry foam clay, and loose snow can produce distinct kinds of winter texture.
The best method depends on the surface and the story you want the scene to tell. Here is how the three approaches compare, along with practical ideas for using them in your own miniature.
In this article
- Method 1: Dab on decorative snow paste
- Method 2: Sculpt drifts with air-dry foam clay
- Method 3: Secure loose snow with a light adhesive mist
- How to choose the right method
Method 1: Dab on decorative snow paste
Decorative snow paste is a useful choice when you want a controlled layer with a slightly sparkling, granular finish. In her winter customization tip, Tkaplan used Aleene's Glitter Snow on a Christmas miniature and applied it by dabbing with a brush.


Rather than brushing the paste flat like paint, tap it onto the surface. Small dabs leave irregular peaks and tiny pockets that catch the light. Use a thinner layer on vertical trim and roof edges, then add more material where snow would naturally collect.
Tkaplan noted that the material can be applied as thickly or thinly as needed and allowed her project to dry for 24 hours. Follow the directions on the product you use, and avoid handling the miniature until the thickest areas are fully firm.
Method 2: Sculpt drifts with air-dry foam clay
For deep, rounded accumulation, air-dry foam clay offers more volume than paste. Kim Kieffer used it across roofs, trees, rocks, and ledges in a snowy book nook. As she explained in her Community post, the material could be pressed, flattened, built up, or moved while she worked.


Start with a small piece, press it into place, and feather the edge into the surface. Add a second piece only where a deeper drift makes sense. Let gravity guide the shape: snow may be thick near a roof valley, curl over an eave, or gather on the windward side of a tree.
The most convincing lesson from Kim's build is not to over-polish the surface. Slight lumps, soft ridges, and uneven edges help the snow look as though it arrived in changing wind rather than from a perfectly even mold.
Method 3: Secure loose snow with a light adhesive mist
Loose flocking or artificial snow is effective when you want fine frost across a broad scene, but it can be difficult to keep in place. While working on a winter customization, Rukya Alkaabi shared a solution in her progress update: she mixed glue, paint, and a little water in a spray bottle, then misted the scene to help secure the white snow material.


Start with a small test batch and try it on scrap material first. Check that it dries clear without warping paper, staining paint, or clogging the spray nozzle before using it on the finished scene.
When applying loose snow, work in stages. Place a light layer, mist from a distance, and let it settle before deciding whether the scene needs more. A fine mist is safer than soaking the model, especially around paper surfaces, wiring, lights, and unfinished wood. Keep electrical parts protected and unpowered until everything is completely dry.
How to choose the right miniature snow method
Choose snow paste for precise edges, modest buildup, and a lightly sparkling texture. Choose foam clay when the scene needs deep drifts with visible volume. Choose loose snow when you want a fine dusting across ground cover, plants, steps, or a wider landscape.
You can also combine methods thoughtfully. Foam clay can establish the main shape of a drift, while a small amount of paste or loose flocking softens the surface. The key is restraint: leave some roof tiles, branches, and pathways visible so the snow has contrast and the miniature remains readable.
Whichever material you choose, observe how real snow gathers. Build depth at corners and sheltered edges, vary the thickness, and resist the urge to make every surface identical. Those small differences are what turn white craft material into a convincing winter story.
Creative builds and photography by Robotime Community members Tkaplan, Kim Kieffer, and Rukya Alkaabi. These projects contain personal modifications and additional materials that are not included with the original kits.

Robotime Creative Team
As Robotime's earliest audience and testers, they start from user needs and are dedicated to sharing stories and insights about the brand and its products.
Robotime is a creative lifestyle company dedicated to designing and developing 3D puzzles, toys, and wooden handicrafts. Subscribe to learn more.
Enjoy Robotime building guides and creative inspiration?
Add Robotime as a Preferred Source on Google to see more of our latest stories in Search.
 Add Robotime to your Preferred Sources
Robotime Creative Team
As Robotime's earliest audience and testers, they start from user needs and are dedicated to sharing stories and insights about the brand and its products.


Leave a comment
This site is protected by hCaptcha and the hCaptcha Privacy Policy and Terms of Service apply.