




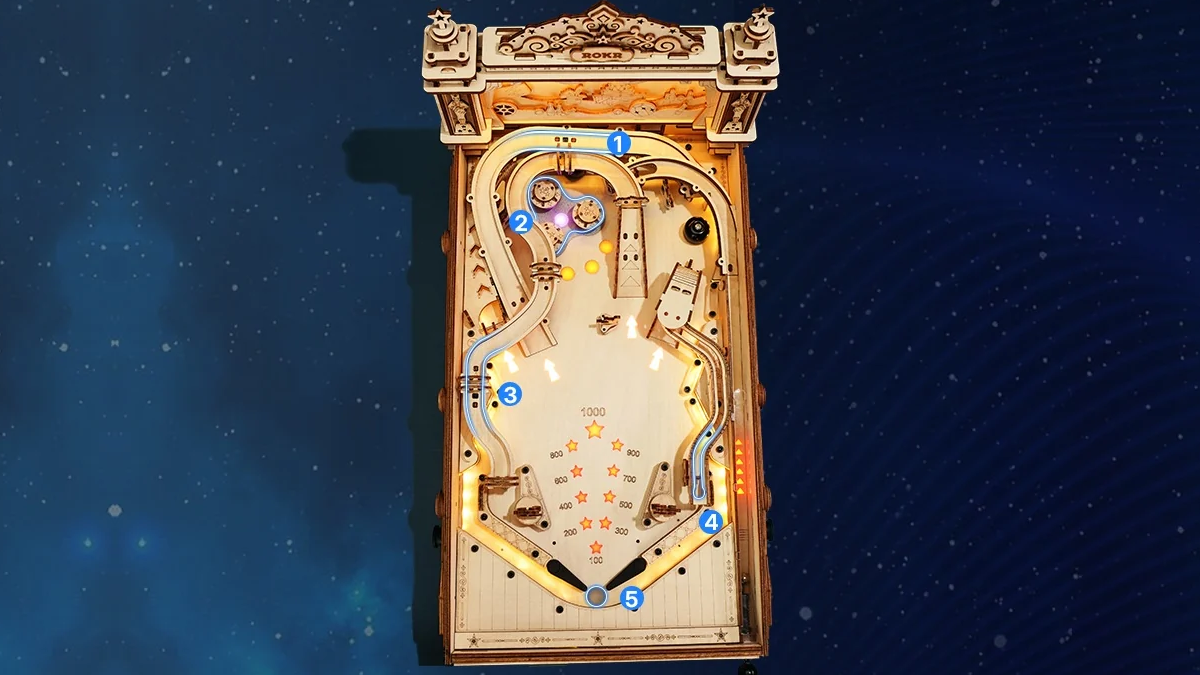
A pinball machine looks playful when the lights are on and the steel ball is moving. Building one is a more exacting experience. Beneath the ramps and circus scenery, the ROKR Pinball Machine combines 482 wooden pieces with flippers, sensors, wiring, lights, sound, and a working scoring system.
Robotime currently lists an estimated 12-hour assembly time, a five-star difficulty rating, and a recommended age of 18+ for the ROKR 3D Pinball Machine. Community builders, however, reveal what that estimate cannot: painting decisions, experience level, alignment, testing, and one small mistake can all change the schedule.
This guide synthesizes publicly shared experiences from five Robotime Community members. Each builder contributes a different part of the picture, so not every observation was reported by all five. Their build times are individual examples rather than controlled test results, and customization, breaks, or troubleshooting extended some projects.
Official Estimate vs. Real Build Time
The official 12-hour figure is best treated as a reference for standard assembly, not a promise. The real-build examples below come from Robotime Community members unless otherwise noted. Their accounts show why elapsed days and hands-on hours are not interchangeable.
Swipe left to view the full comparison.
| Builder / source | Hands-on time | Calendar span | Build type and context |
|---|---|---|---|
| Robotime product page | 12-hour estimate | — | Official standard-assembly reference |
| Mike Frost | About 20–24 hours | Three days | Assembly followed by selected paint details |
| Nita Davis | A little over 20 hours | — | First machine, left unpainted |
| TinkerTime | — | About three to four weeks | Full painting, troubleshooting, repeated disassembly, and a replacement part |
| Haunna | — | Several weeks | Painted build with a personal gameplay modification |
These accounts cannot establish an average build time. They do show why hands-on hours and elapsed calendar time must be separated: three or four weeks may include short sessions, drying time, pauses, troubleshooting, and waiting for a part rather than continuous assembly.

What Makes the ROKR Pinball Machine Difficult to Assemble?
1. Aligning the ramps and cabinet panels
The machine depends on several closely connected structures lining up at once. TinkerTime found the side panels demanding to position, while reflections from the clear plastic made some insertion points harder to see. The same build later revealed a raised ramp caused by a tab near an LED that had not seated fully. Careful alignment matters because a small obstruction can affect the ball path even when the surrounding structure looks complete.
2. Managing wiring and electronic components
The electronic leads, speaker, lights, and power connections add a different type of difficulty from pressing wooden pieces together. In TinkerTime’s build, reaching one incorrectly seated area required removing the back, sides, speaker, and electronics. A resistant power connector later broke and temporarily stopped the lights and sound; a replacement connector allowed the project to continue. This was an individual incident, not evidence that every ROKR Pinball Machine develops the same fault.

3. Testing before final assembly
TinkerTime’s troubleshooting experience highlights a useful precaution: test movement and electronics before the cabinet becomes difficult to reopen. Check that ramps sit at the intended height, supports are installed, flippers move freely, wires follow the manual, and the ball can travel through the playfield before closing the surrounding panels.

Can Beginners Build the ROKR Pinball Machine?
Yes, a determined beginner can build the ROKR Pinball Machine, but it is not an ideal first DIY kit. Its mechanical assembly, wiring, alignment, and testing require patience and close attention to the instructions.
Robotime Community member TinkerTime completed it as a first ROKR build. However, the original post does not say whether this was the builder’s first detailed model kit of any kind. The experience shows that previous ROKR experience is not essential, but it should not be treated as proof that the kit is easy for complete beginners.
The guidance below is an editorial assessment based on the product structure and the limited community accounts reviewed, not a controlled user survey.
Swipe left to view the full comparison.
| Builder background | Our assessment |
|---|---|
| Complete beginner to DIY model kits | Possible, but not the best first kit |
| First ROKR build with some DIY experience | Achievable with patience and careful testing |
| Experienced wooden or mechanical model builder | Challenging but manageable |
| Builder planning a painted version | Expect additional preparation and more chances for rework |

Should You Paint the ROKR Pinball Machine Before or After Assembly?
Painting adds another layer to the project, but the more useful question is when to do it. Two Robotime Community builders took different approaches.
Swipe left to view the full comparison.
| Approach | Community example | Potential advantage | What to watch for |
|---|---|---|---|
| Paint after assembly | Mike Frost | Finish and test the standard build first | Completed structures can make some surfaces harder to reach |
| Paint during assembly | TinkerTime | Easier access to individual panels and decorative details | Keep paint away from tabs, slots, joints, and moving contact points |
Mike Frost painted selected details after completing the machine and later felt that painting during assembly would have been easier. TinkerTime painted individual sections as the build progressed, which provided better access to large surfaces and stripe details.


Neither method is automatically better for every builder. Painting during assembly offers better access, while painting afterward reduces the risk of paint interfering with fit before the standard machine has been tested. If you plan a fully customized design, painting selected parts during assembly is likely the more practical approach. Mask connection points carefully and keep paint away from tabs, slots, sensors, and moving components. If your priority is completing a working machine first, assemble and test it before adding limited decorative details.
For a fuller customization example, see how Jill Francisco’s family personalized their ROKR Pinball Machine.
Is the Finished Pinball Machine Worth the Effort?
For builders who want more than a static display, the functioning result helps justify the complexity. Liset found the completed machine engaging enough to keep playing while trying to record it. Haunna experimented with small O-rings on the flippers to increase rebound; that was an unofficial personal modification and may change performance, so it should not be treated as an approved assembly step.


For a broader look at the machine’s features and gameplay, read the existing ROKR Pinball Machine review.
Tips from Real ROKR Pinball Machine Builders
- Separate hands-on build time from calendar time when planning the project.
- Test ramps, flippers, ball travel, lights, and sound before closing the cabinet.
- Use a comfortable screwdriver and fit parts gently instead of forcing resistance.
- If painting, plan colors early and keep tabs, slots, and moving contact points clear.
- Use the official ROKR Pinball Machine assembly instructions and consult the ROKR Pinball Machine Troubleshooting & FAQ before dismantling large sections without a diagnosis.
Final Verdict: Who Should Build the ROKR Pinball Machine?
A strong match for: patient adult builders, mechanical-model fans, arcade enthusiasts, detail-oriented makers, and anyone who wants a finished project that can still be played.
Think twice if: you want a quick weekend build, dislike small electronic connections, do not want to test mechanical movement, or expect a fully painted result without adding substantial time.
The ROKR Pinball Machine is best understood as a layered mechanical project. Standard assembly is already substantial; painting turns it into a separate creative undertaking; and troubleshooting may test how carefully the mechanical and electronic systems have been aligned. For the right builder, that complexity is part of the appeal.
Ready to decide? Explore the ROKR Pinball Machine, or start with the full review if you want a closer look at its features before choosing.
Builder Sources
- TinkerTime: painting update, late-stage troubleshooting, replacement and return to the build, and completed review.
- Mike Frost and Nita Davis: completed-build timing and painting discussion.
- Haunna: painted build and optional flipper modification.
- Liset: finished machine in action.


Robotime Creative Team
As Robotime's earliest audience and testers, they start from user needs and are dedicated to sharing stories and insights about the brand and its products.
Robotime is a creative lifestyle company dedicated to designing and developing 3D puzzles, toys, and wooden handicrafts. Subscribe to learn more.
Enjoy Robotime building guides and creative inspiration?
Add Robotime as a Preferred Source on Google to see more of our latest stories in Search.
 Add Robotime to your Preferred Sources
Robotime Creative Team
As Robotime's earliest audience and testers, they start from user needs and are dedicated to sharing stories and insights about the brand and its products.
Robotime is a creative lifestyle company dedicated to designing and developing 3D puzzles, toys, and wooden handicrafts. Subscribe to learn more.


Leave a comment
This site is protected by hCaptcha and the hCaptcha Privacy Policy and Terms of Service apply.