






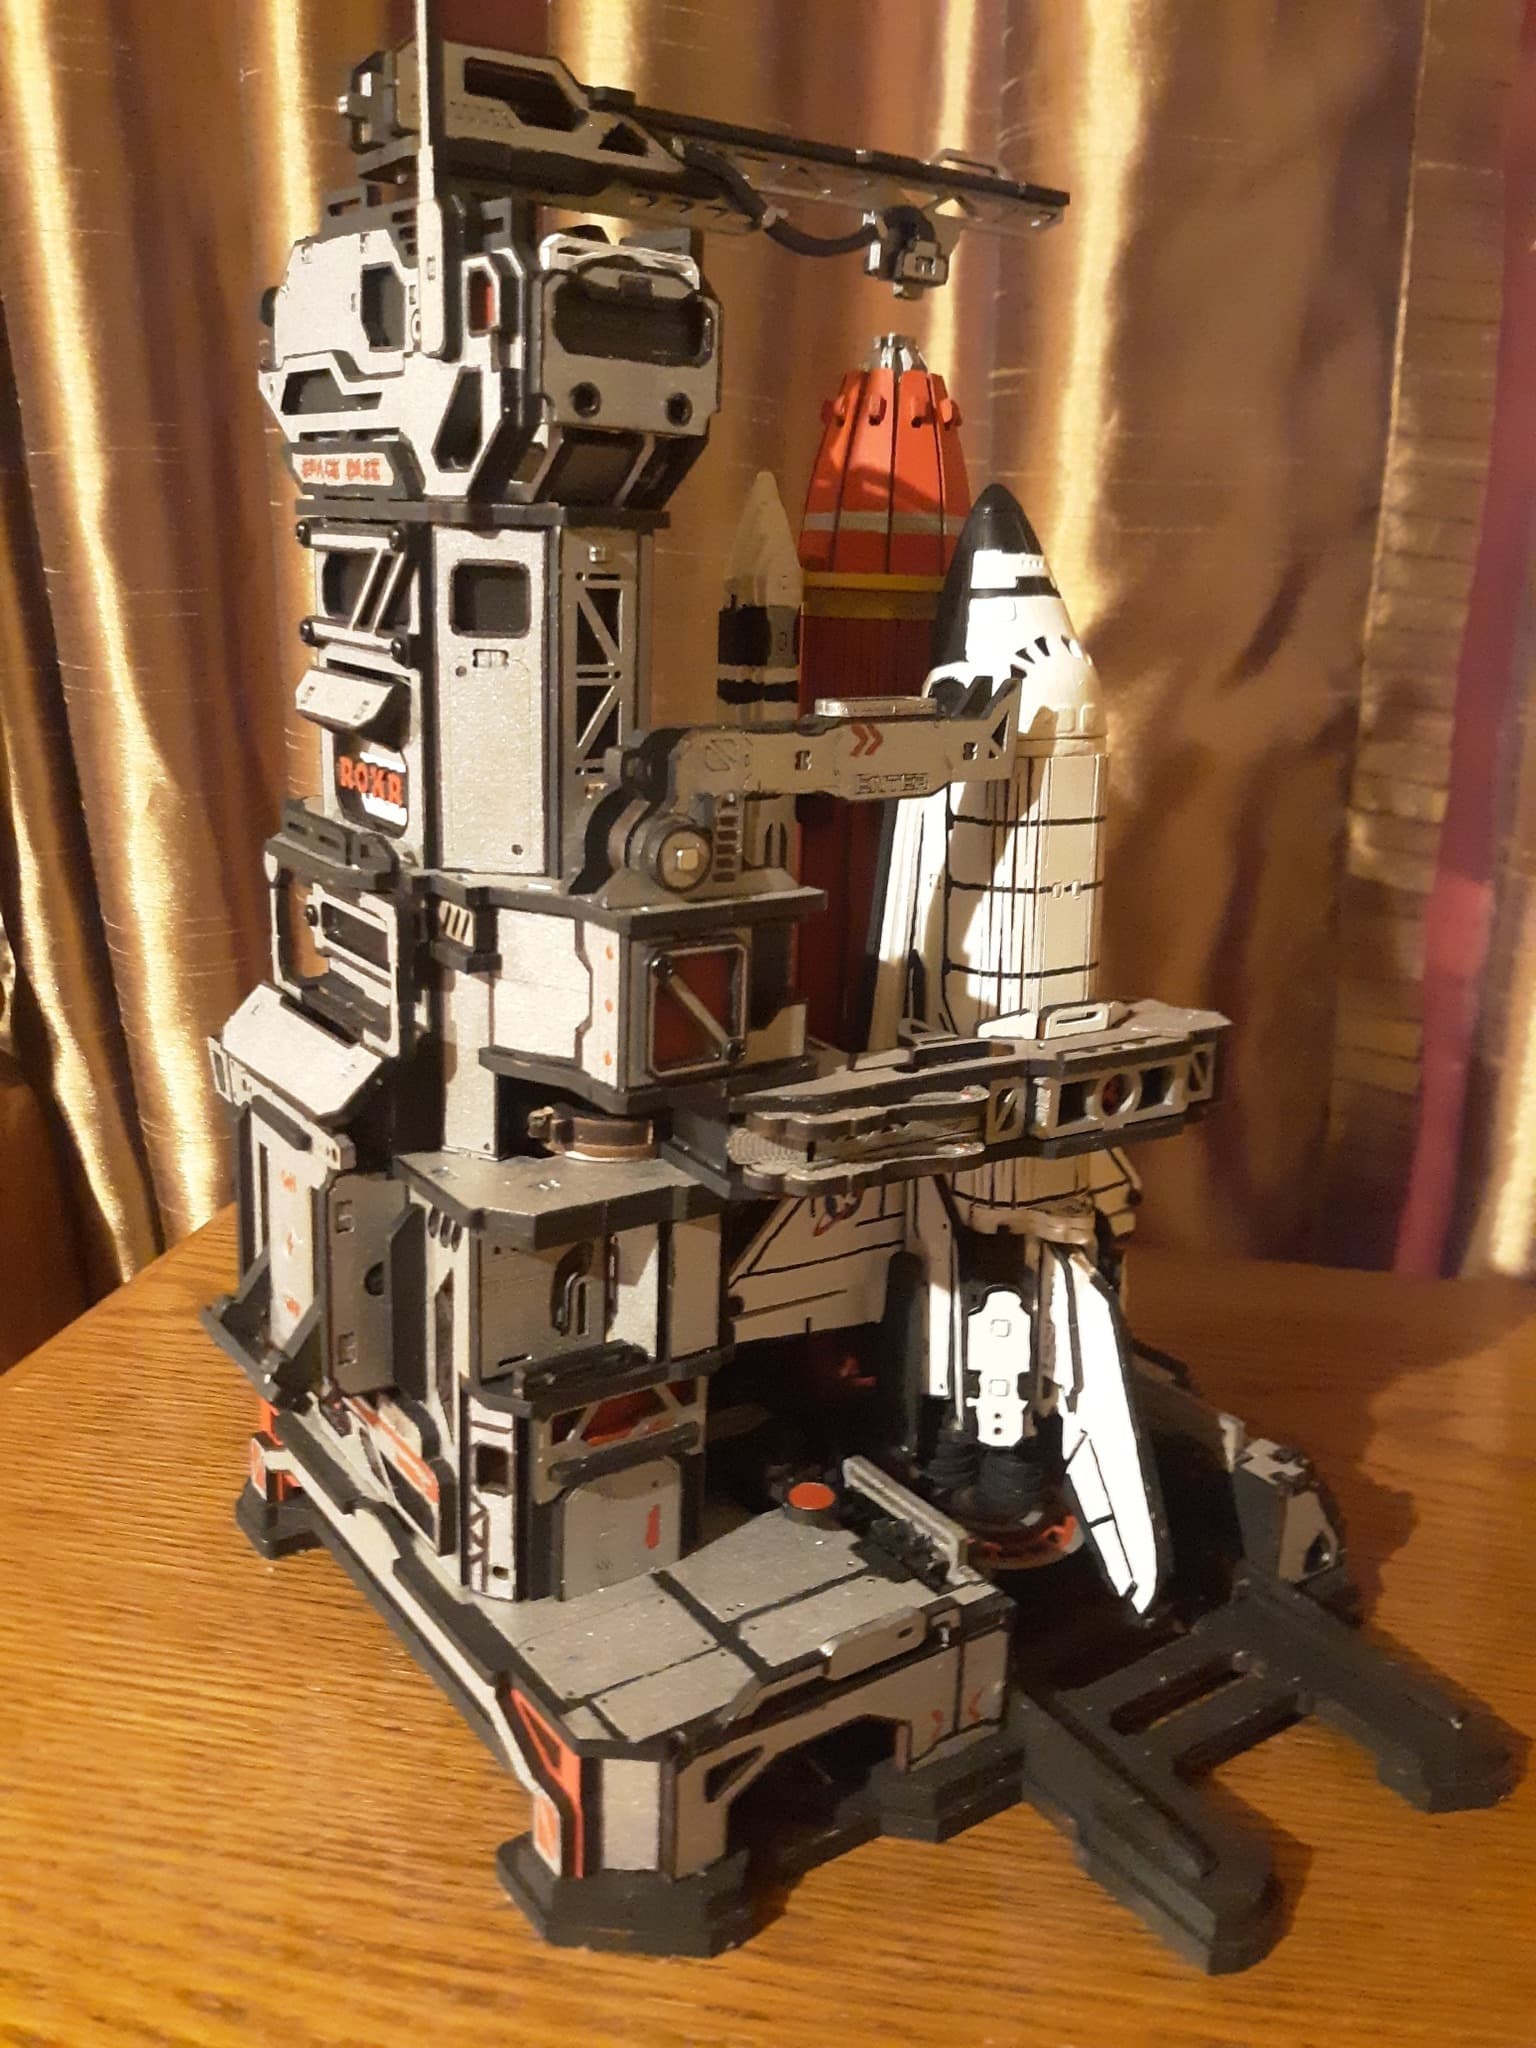
Silver framework, black structural lines and a bright orange-red external tank give Nita Davis’s finished shuttle the presence of a display model built for a mission. Yet the most important detail is not visible in a still photograph: beneath the custom paint, the launch system still moves as intended.
Nita created her version from the ROKR Space Shuttle 3D Wooden Puzzle LKA02. She painted nearly every piece, preserved selected engraved markings and coordinated the shuttle, tower and base into one dramatic palette. Because the original model uses gears, a moving platform, lights and motorized action, every added layer had to respect the fit of the mechanism.
Her project shows how a mechanical wooden model can be personalized without treating decoration and function as separate jobs. The useful lesson is a sequence: plan the finish early, protect moving contact points, test repeatedly and slow down when a tightly fitted assembly resists.
Plan the finish before assembly
A coherent custom finish begins before the first major assembly. Nita chose a restricted palette and carried it across very different parts of the model: metallic tones emphasize the launch tower, strong black lines sharpen the orbiter and warm red-orange color gives the tank visual weight. Repeating those colors helps the many individual pieces read as one system.
She also made an early decision about the model’s engraved detail. In a later Community discussion, Nita explained that she used black marker to outline selected areas before painting and could still see the engraving beneath the finished surface. That was her solution for this particular build—not a guarantee for every paint, marker or wood surface—so testing the combination on scrap material is the safer way to adapt the idea.
“I painted every single piece on mine.”
— Nita Davis
The line matters because it reveals the scale of the planning. Painting the visible exterior is one thing; painting almost every component means considering edges, joints, gears and hidden surfaces before they disappear inside the structure.
Paint flat, then protect the fit
Nita’s most transferable technique was to paint pieces while they were still held flat in their wooden sheets. This gave her a stable surface for the main coats and made it easier to keep the palette consistent. She completed exposed edges in smaller sections as the build progressed.
That convenience comes with a mechanical cost: paint adds thickness. On a decorative miniature, a slightly tighter joint may be manageable. On a motorized model, added friction can affect the moving deck, gears or closely fitted structural parts. Nita compensated by sanding and waxing wherever the fit or movement required it, including painted gears and the platform mechanism.
“Paint a lot, build a lot…over and over. That’s my process on this one.”
— Nita Davis
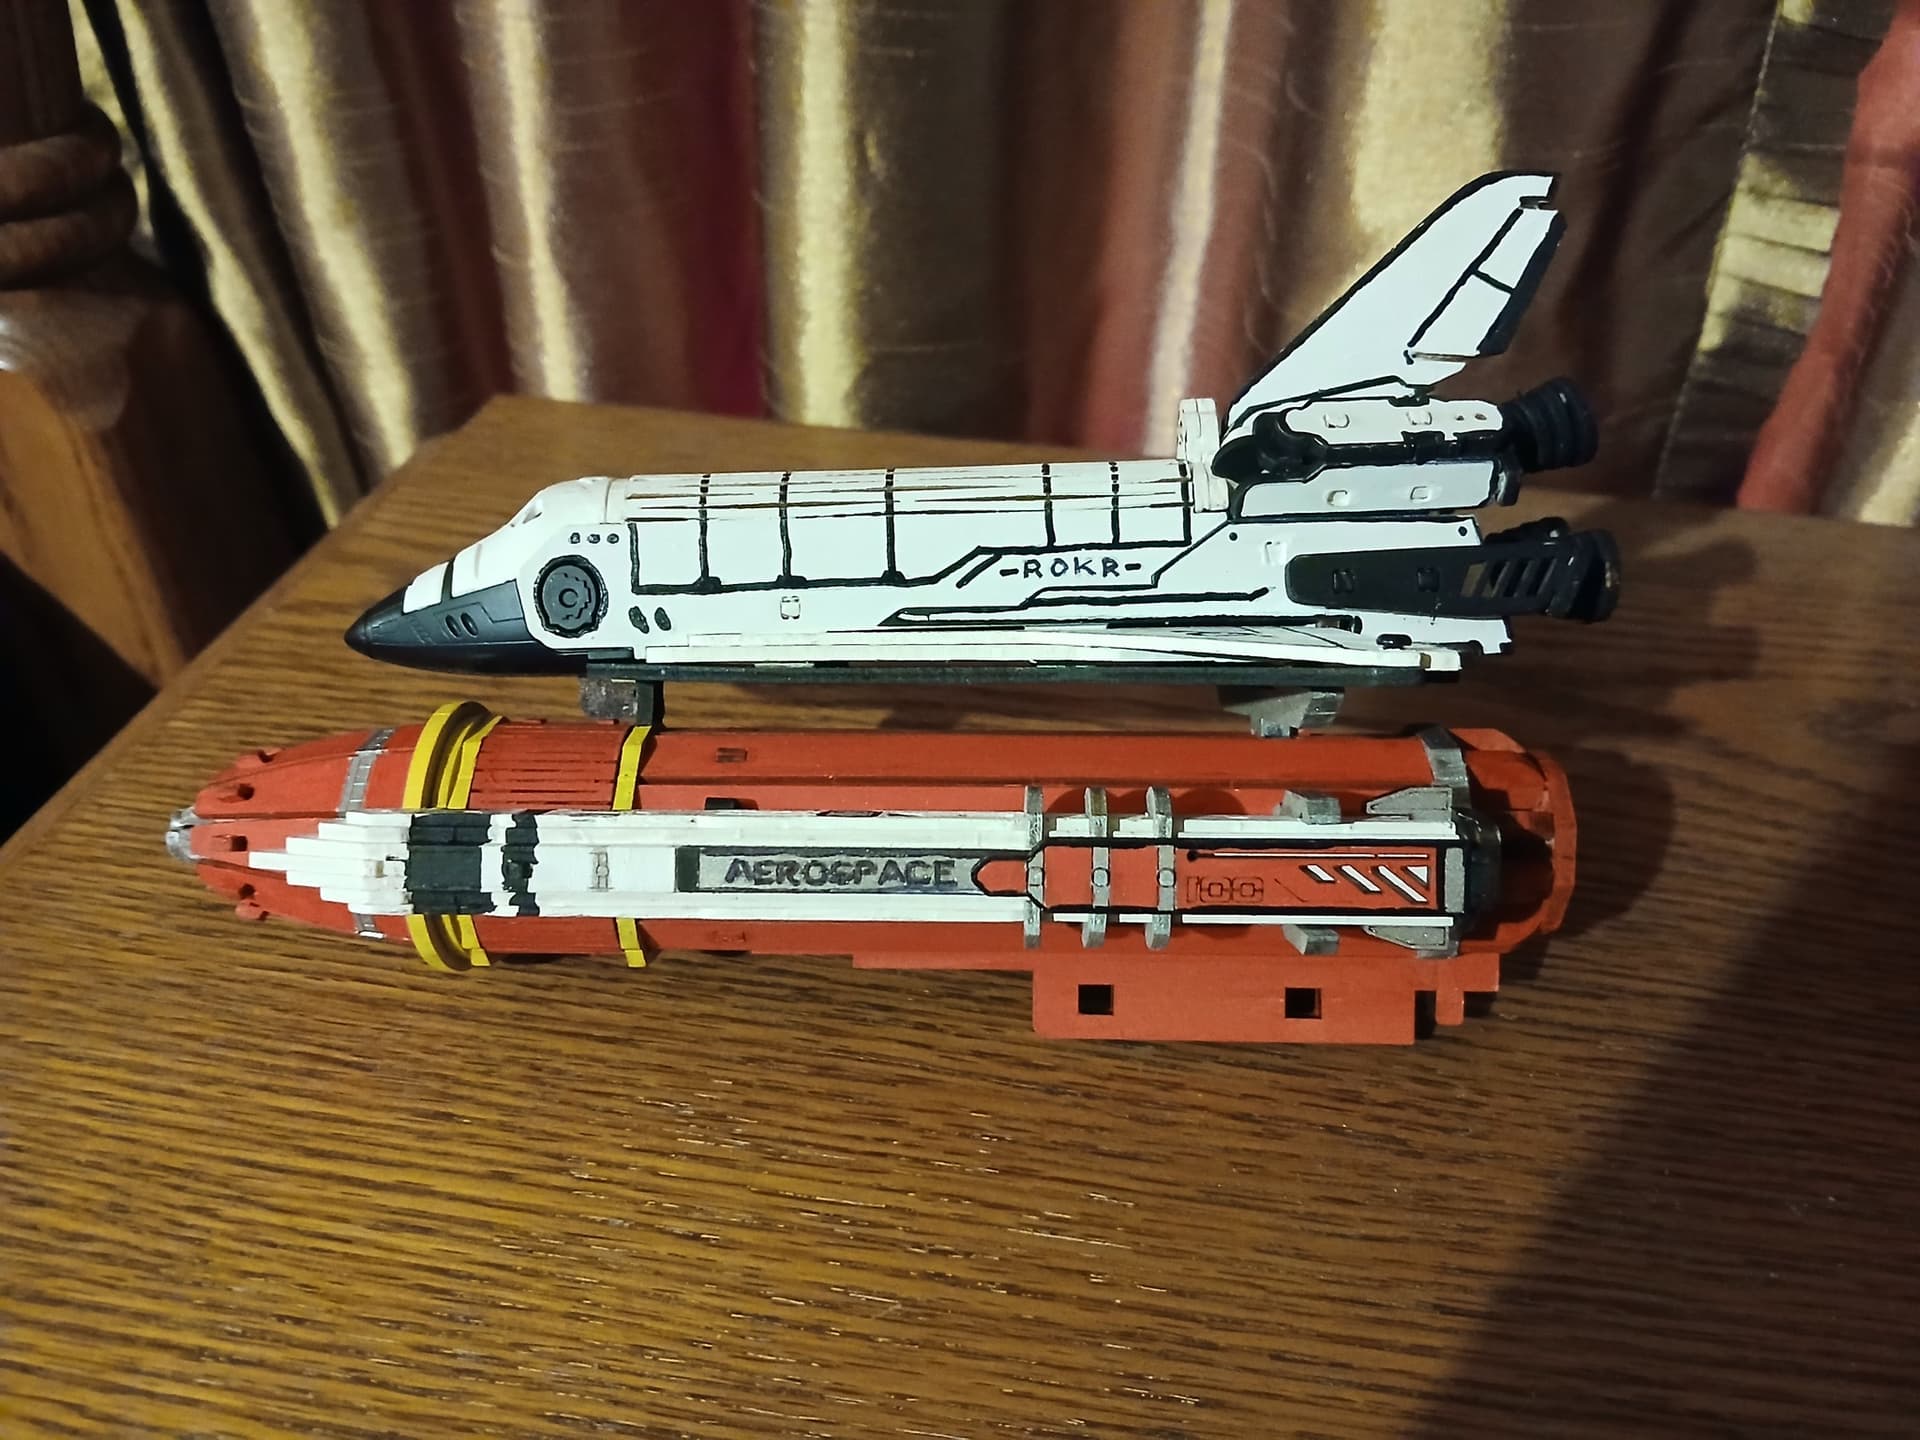
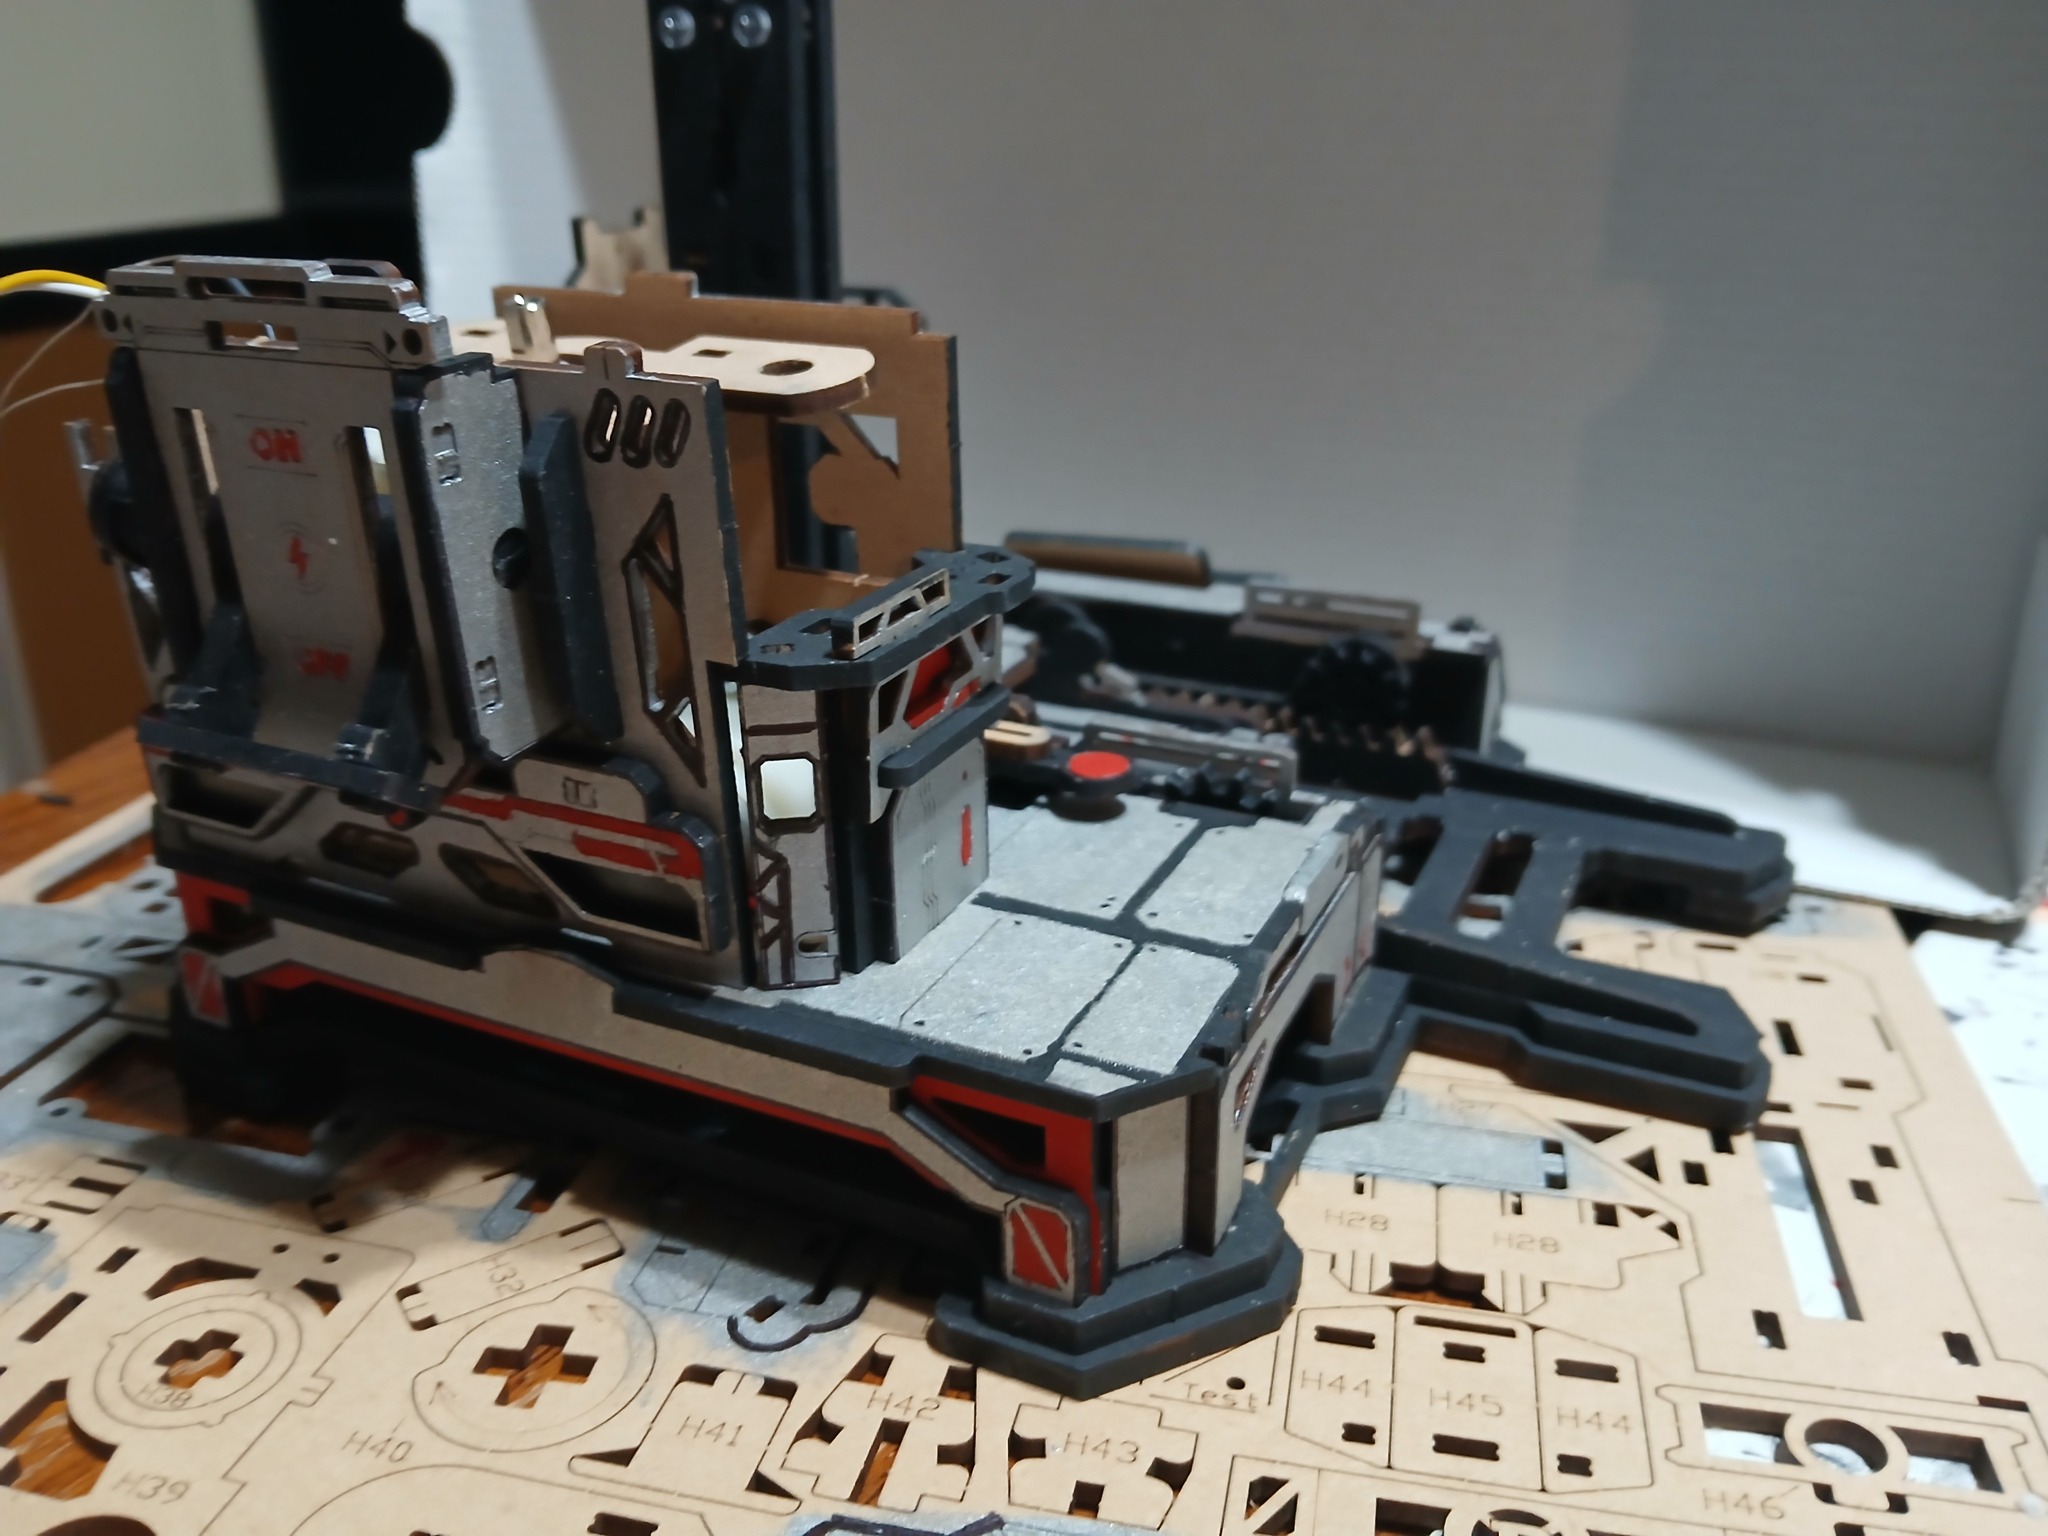
The shuttle and launch platform developed in parallel, with paint added before and during assembly. Photos by Nita Davis.
This alternating rhythm is more practical than finishing every color first and hoping the mechanism still fits. It creates natural checkpoints: paint a section, assemble it, check the contact surfaces and correct any resistance before the next layers make the area harder to reach.
Test the mechanism as you build
Nita treated testing as part of the customization rather than a final reveal. For the electrical test, she reread the sequence and used a build video to understand the timing. Her account makes a broader point: when a test depends on several actions in order, prepare the sequence before touching the switch instead of diagnosing it from memory afterward.
She also emphasized following the light-wiring directions carefully. The unfinished tower photo shows why: wires and electronic components become enclosed by the structure, so a clean route and an early check are much easier than opening a completed assembly.
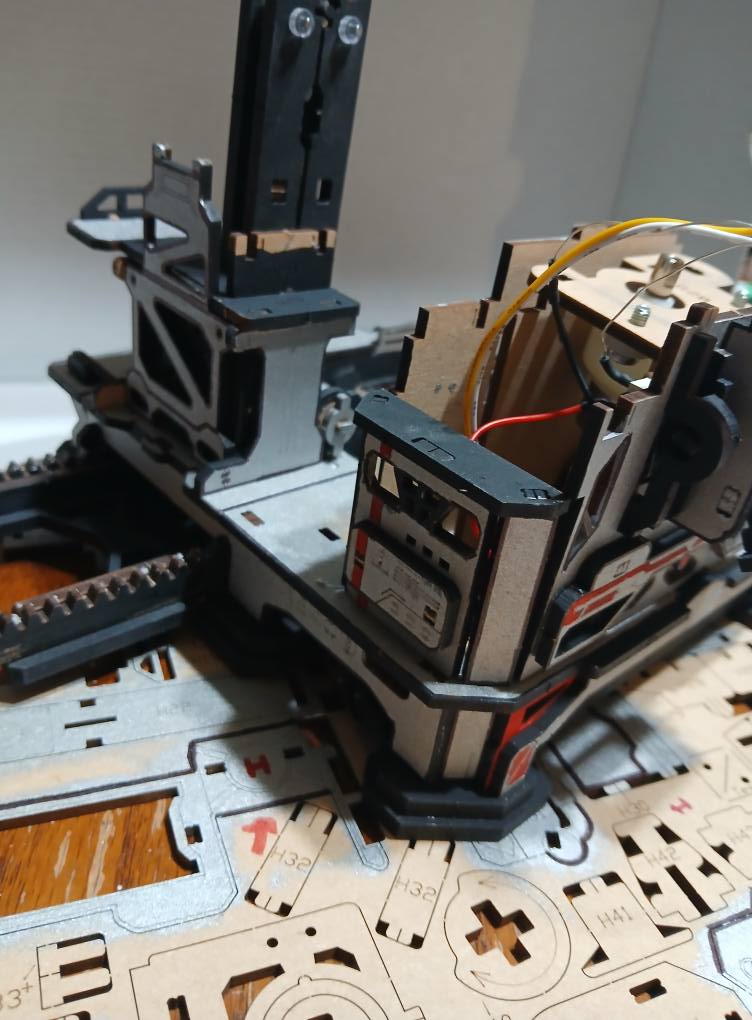
During a later platform test, Nita recommended inserting the specified C14 part, moving the platform repeatedly and adding wax if the motion was not yet smooth. She also glued the tinted window pieces after they repeatedly fell out. These are small corrections, but together they show a disciplined approach: identify the exact source of resistance or instability, adjust that area and test again. Forcing a painted part risks damaging both the finish and the mechanism.
Handle difficult final assemblies patiently
The hardest moments arrived near the end, when several completed sections had to align at once. Nita described the roof as particularly demanding because it had to fit over roughly seven standing pegs. In her detailed tips, she singled out rooftop part J42 and advised patience rather than pressure.
She used the same principle elsewhere: support the swinging launch arm from behind while fitting its parts, and make sure the rocket’s central backbone sits completely flush. If a component resists, stop to sand or wax it instead of using extra force. Late-stage assemblies can feel like one large problem, but the safer method is to check one alignment point at a time.
That patience protects work already completed. By this stage, one forced connection could mark the custom paint, bend a detailed assembly or introduce friction into a movement that had already passed an earlier test.
Let function complete the customization
Nita’s finished photographs show a convincing launch display from every side, but her own measure of success went beyond appearance: after the obstacles, the model ran properly. The painted platform, tower and shuttle still worked together as a mechanical scene.
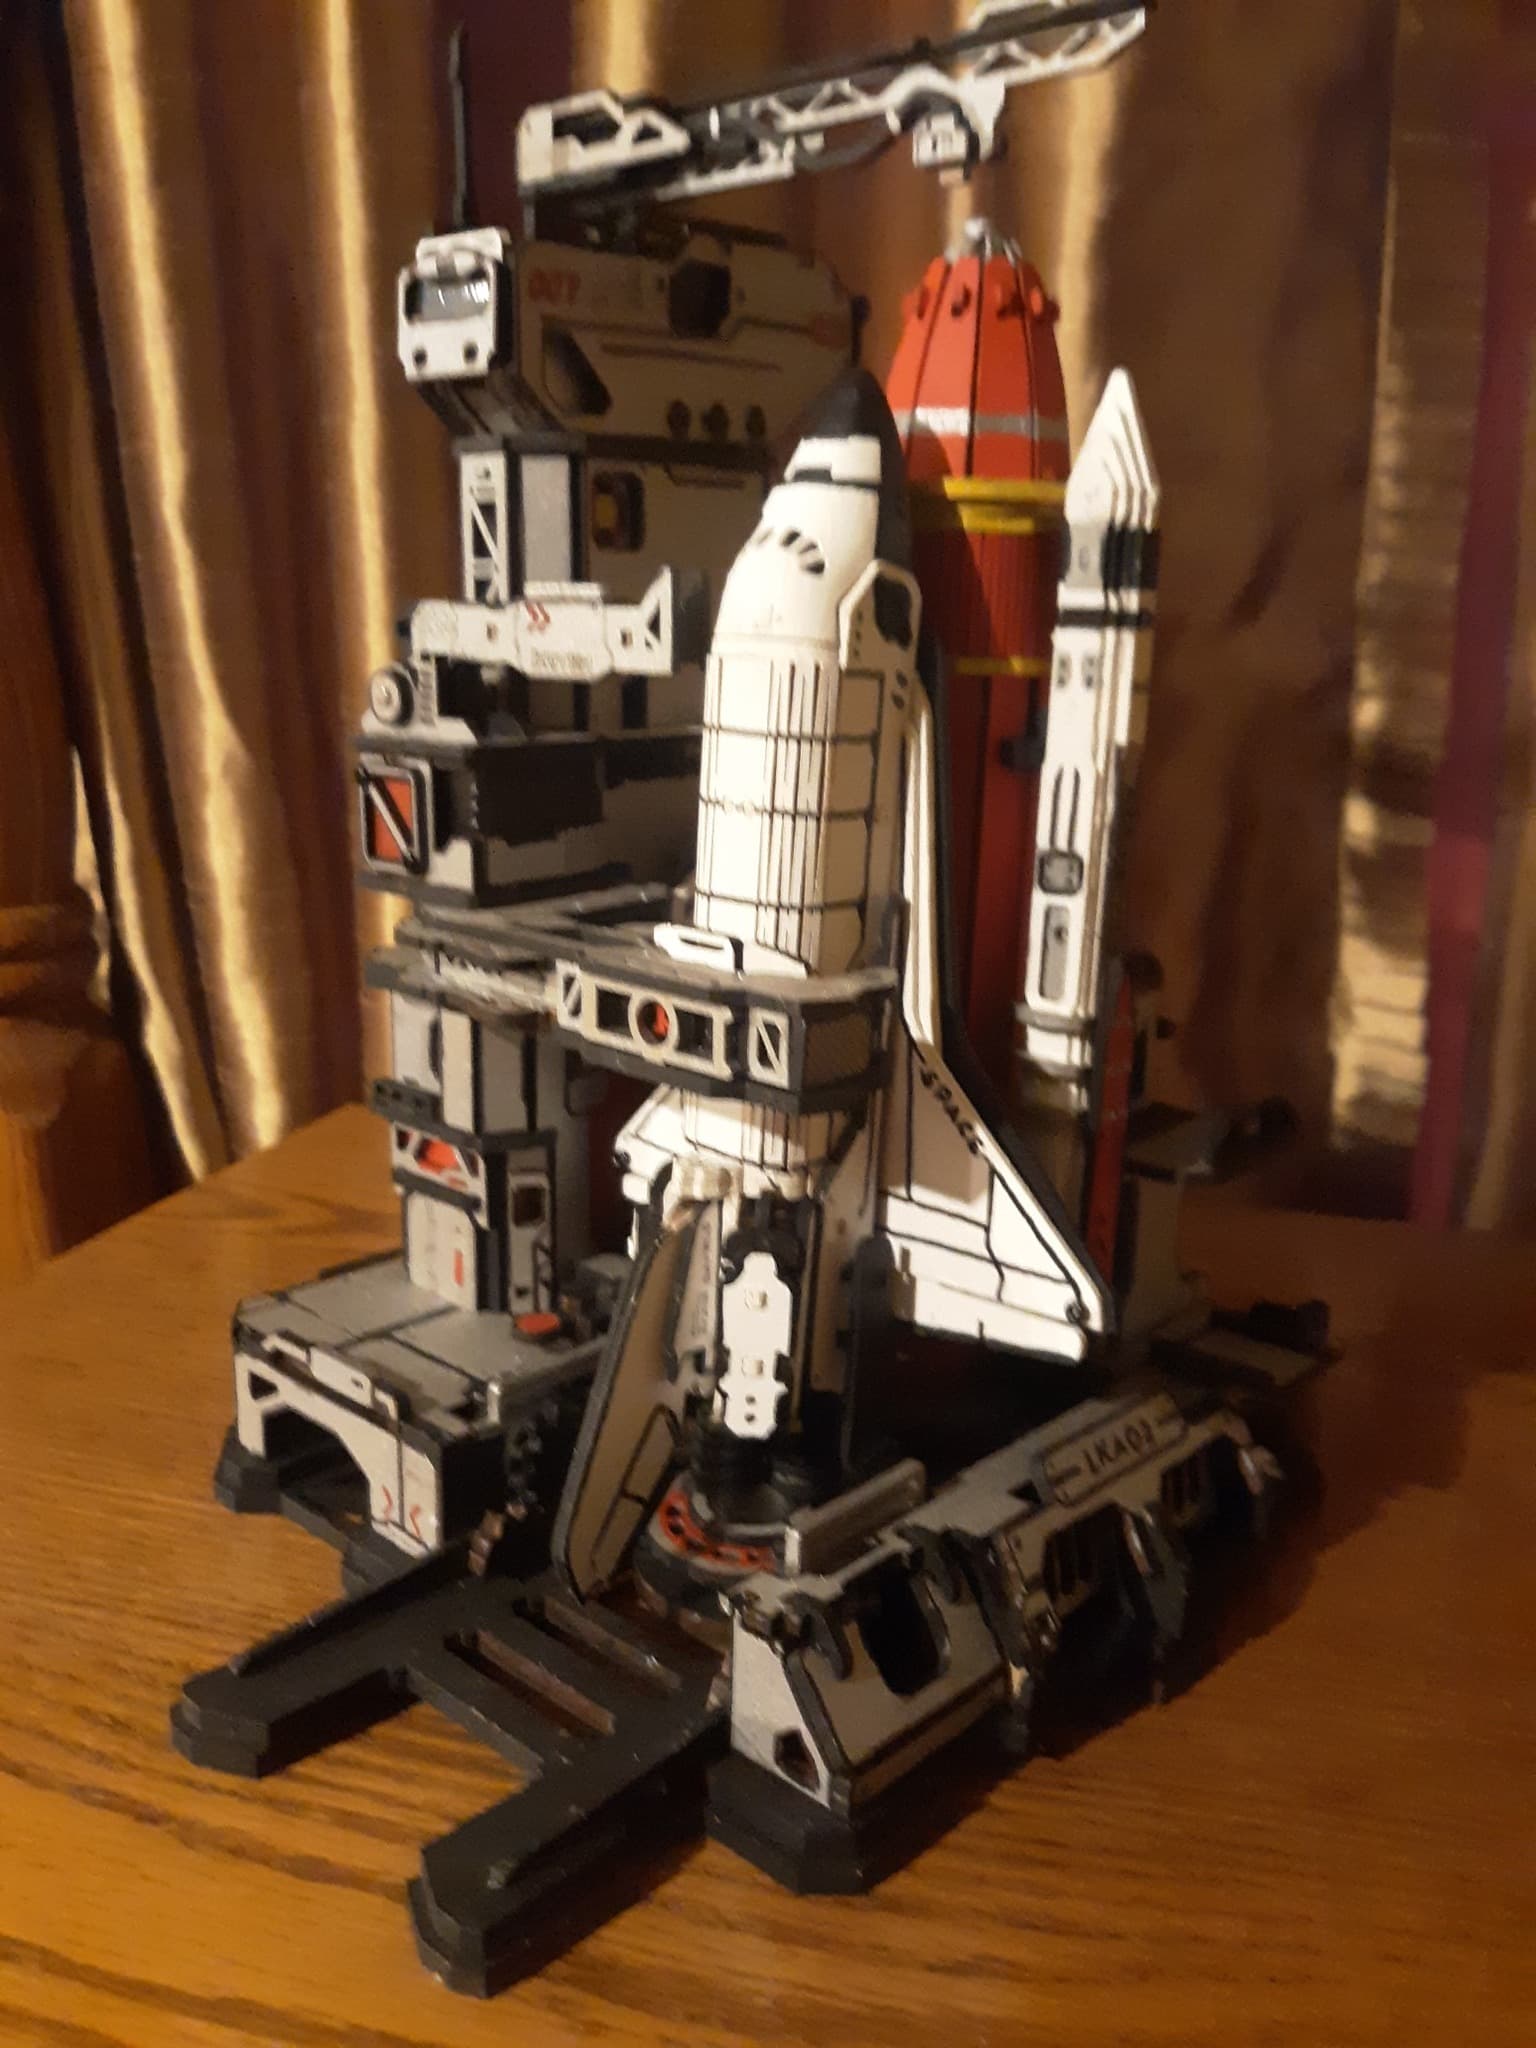
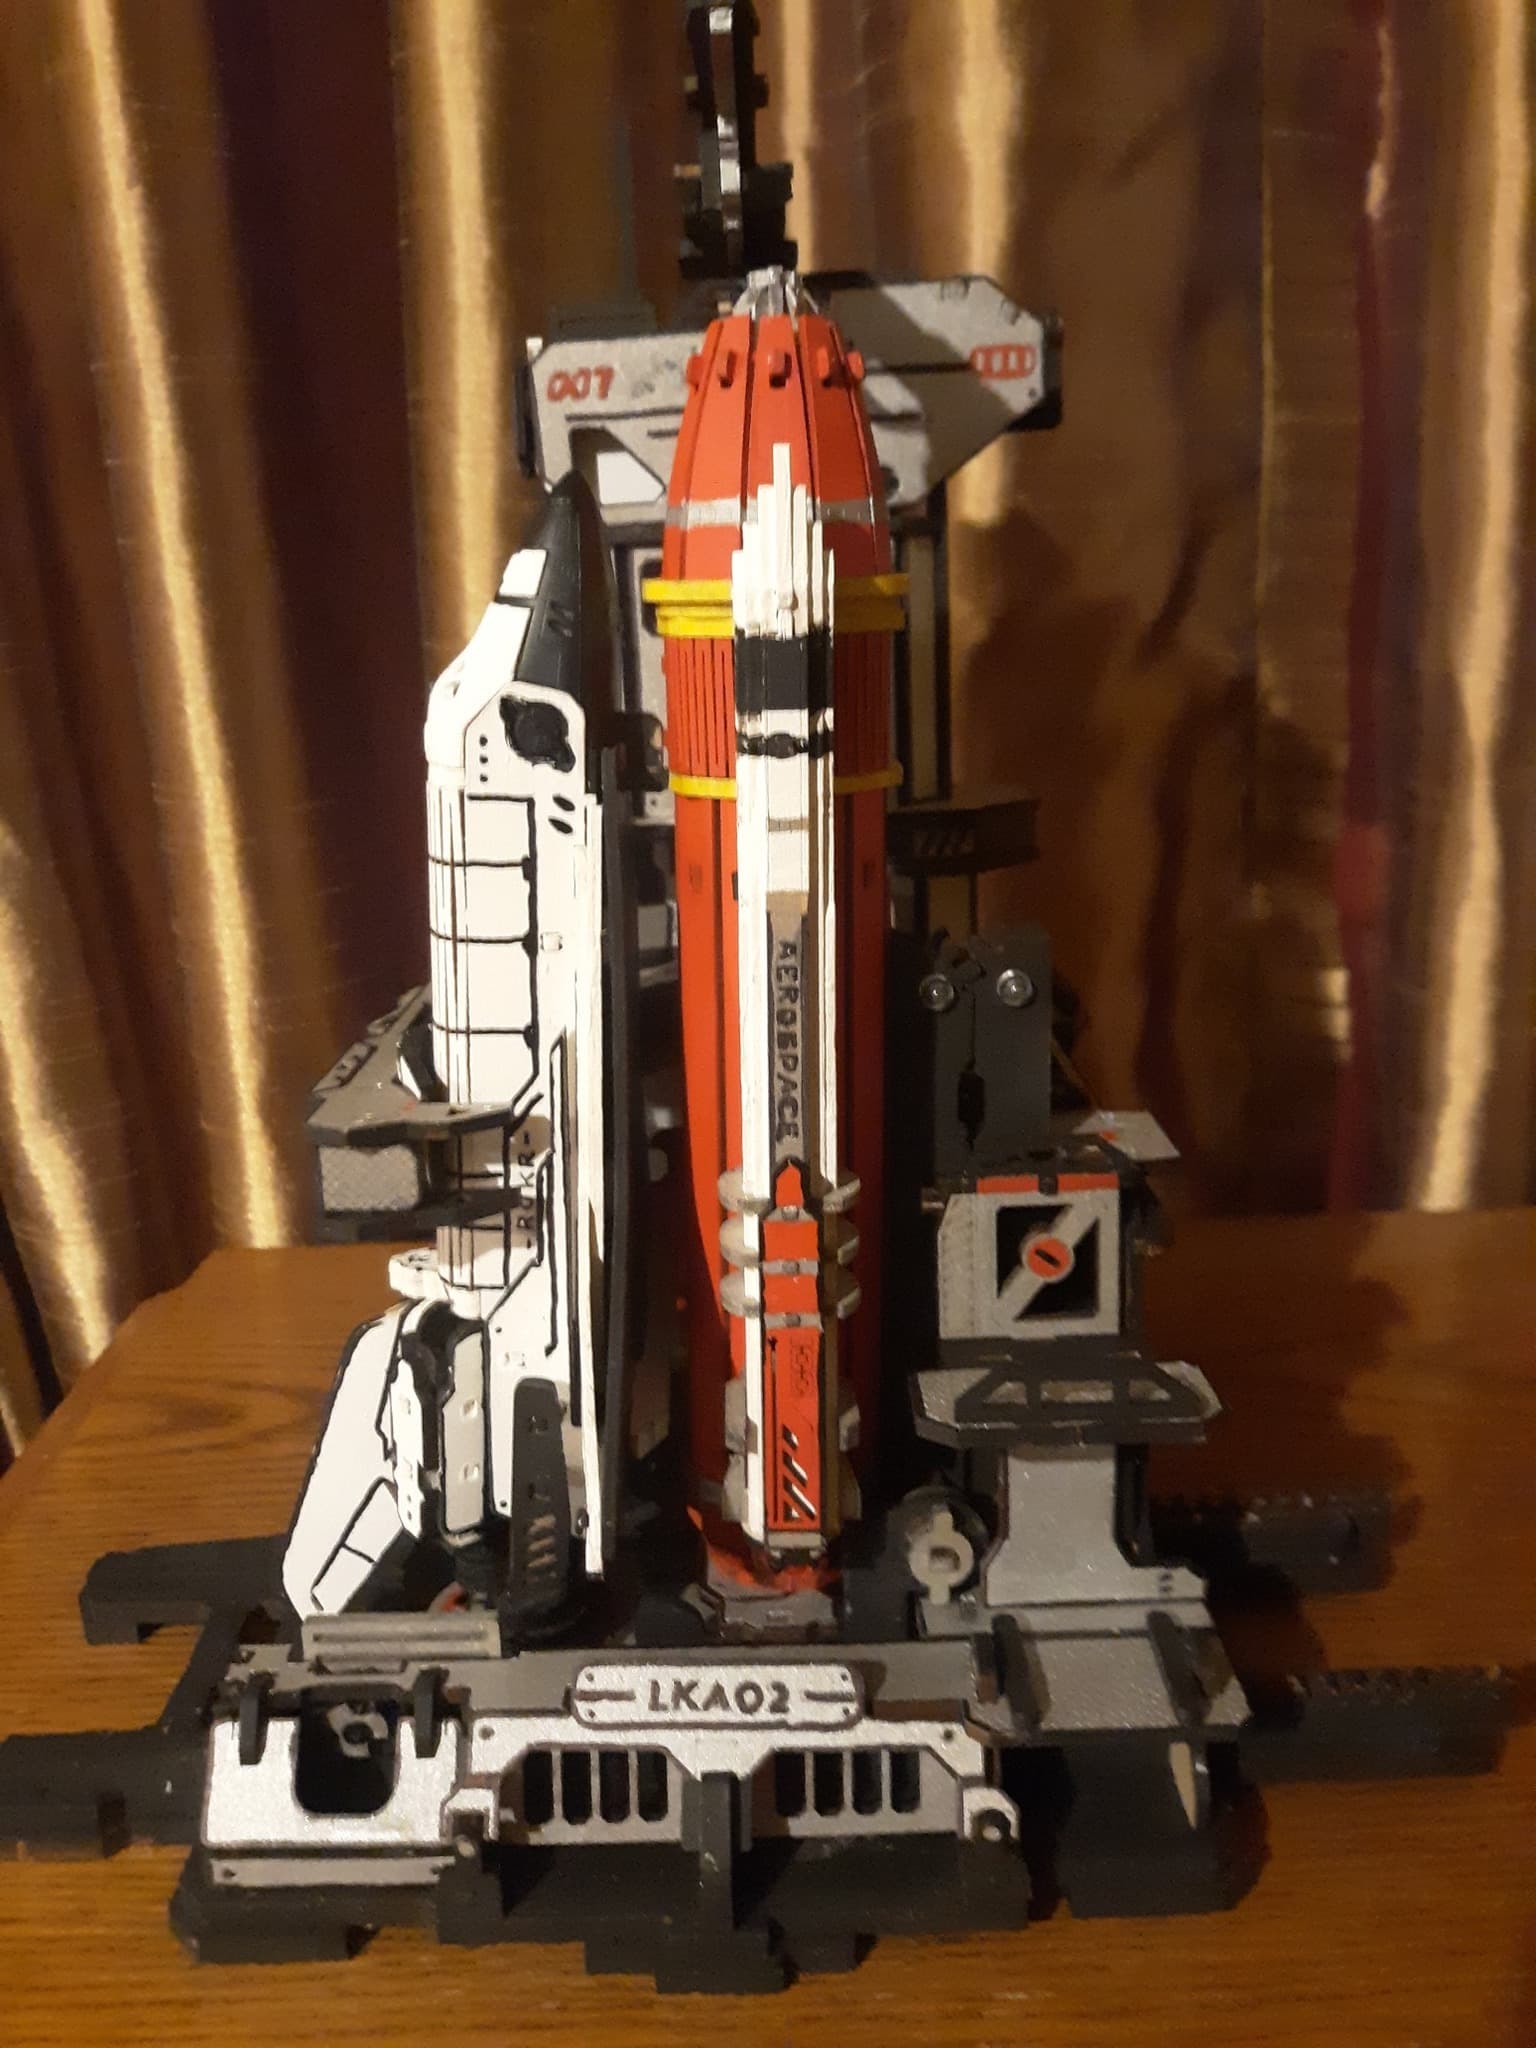
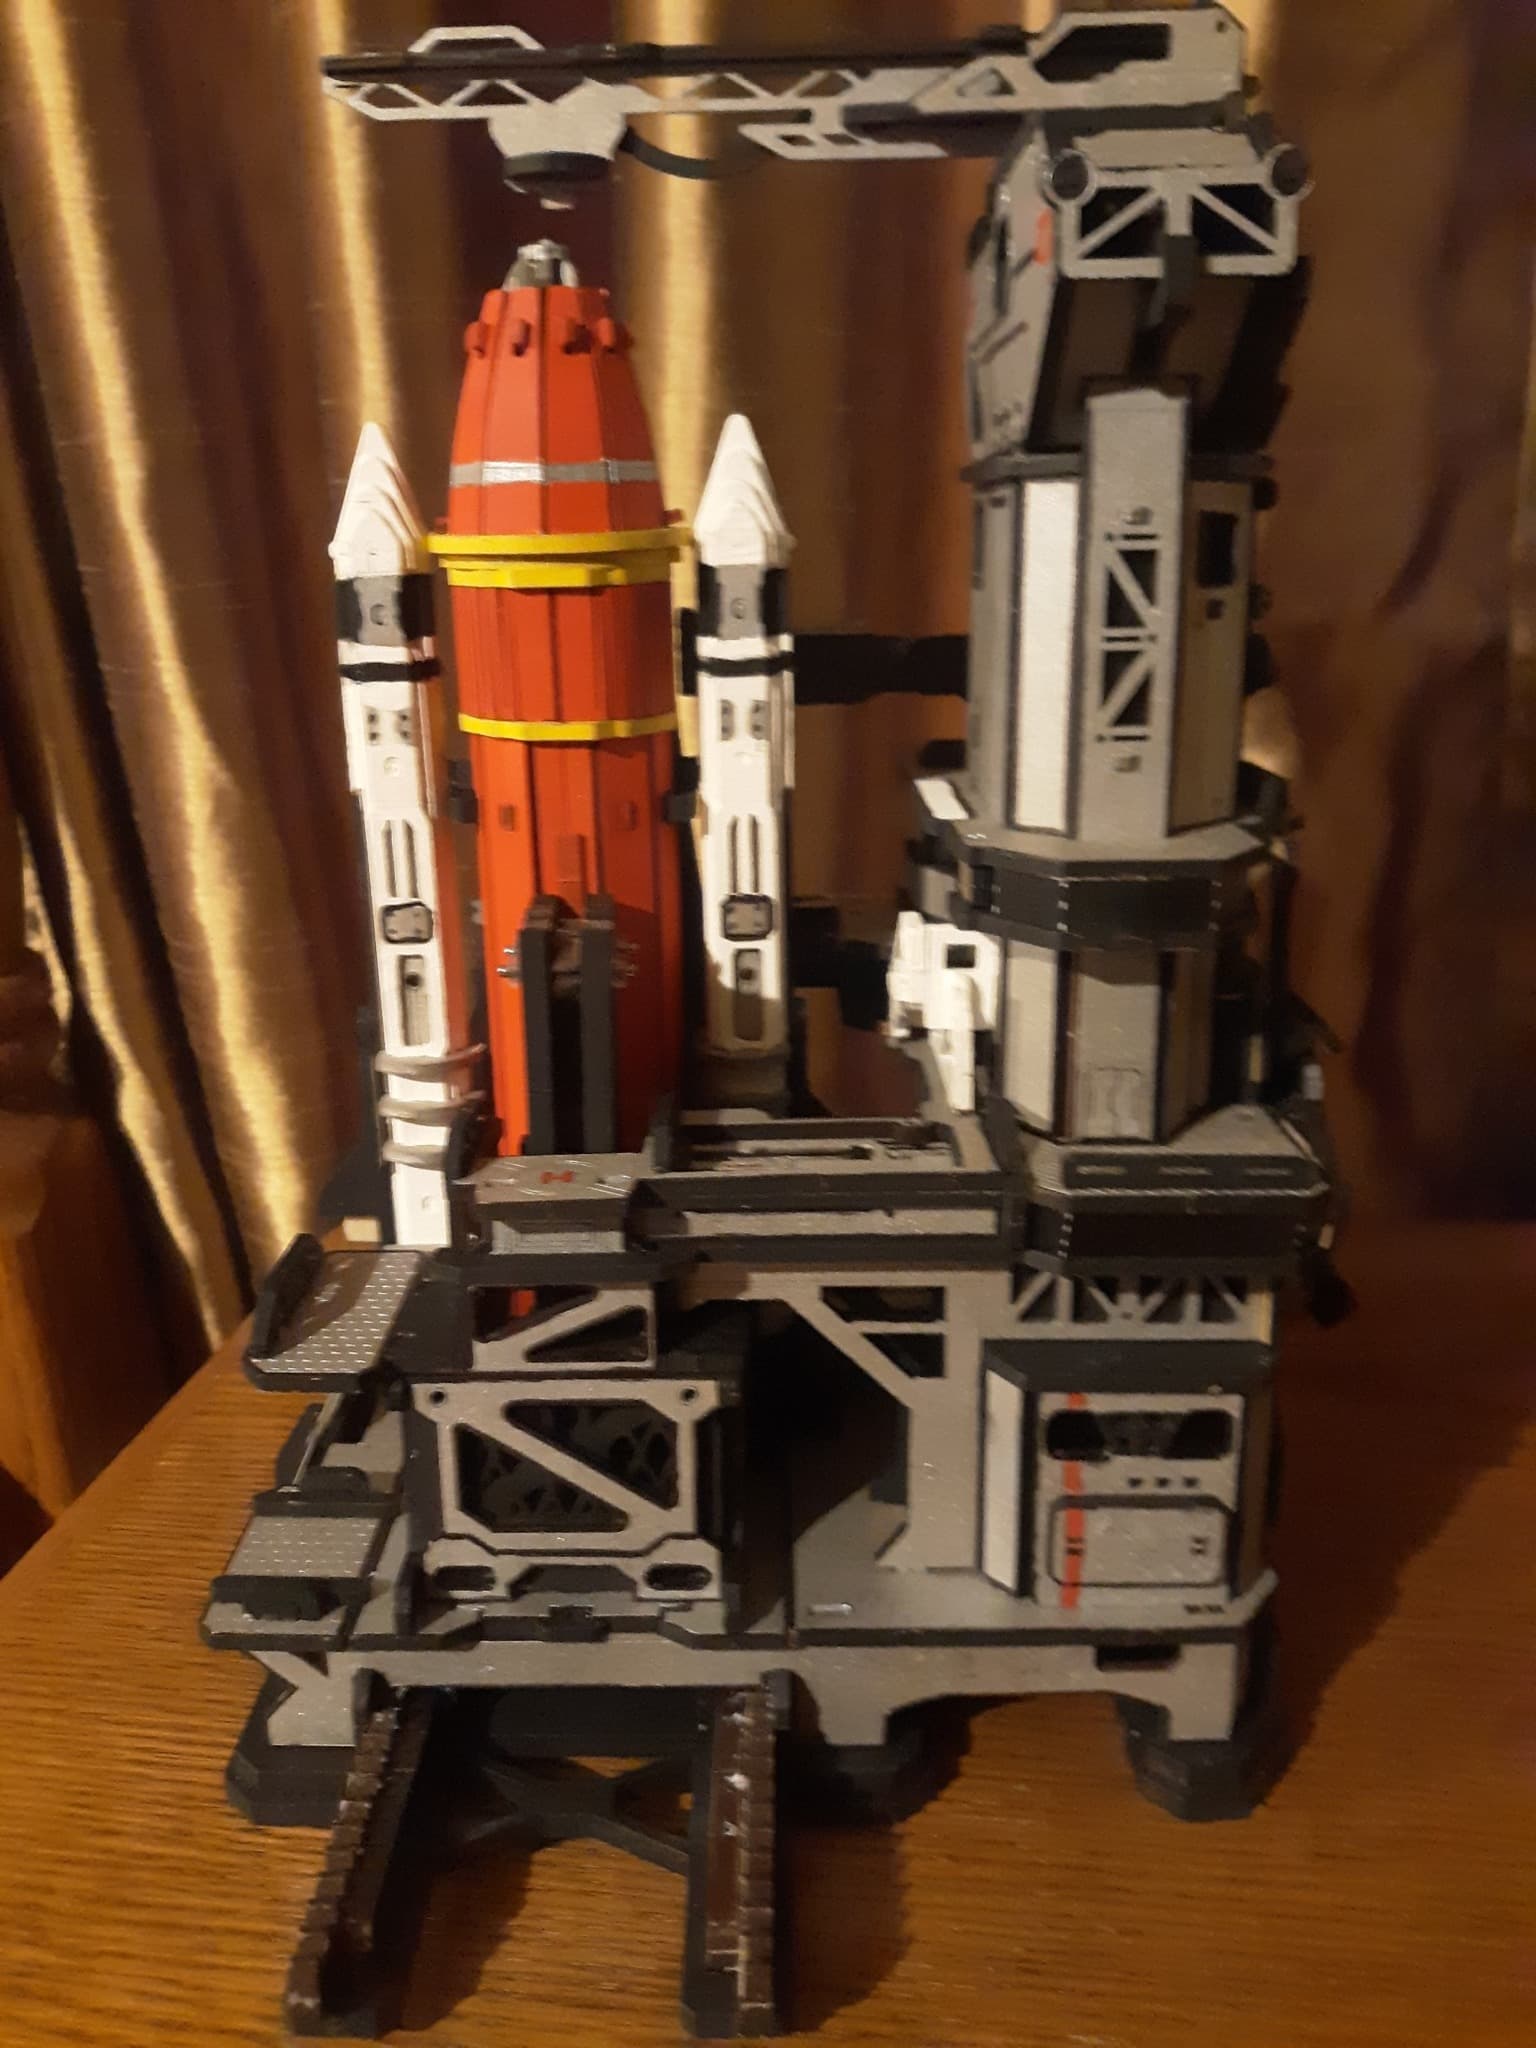
Multiple views reveal how the palette continues around the shuttle, tank, base and launch tower. Photos by Nita Davis.
For other makers, that is the most useful standard to borrow. A mechanical customization is complete when its visual choices strengthen the model’s character and its moving parts still perform their job. Thin coats, clean interfaces and frequent tests give creativity room without asking the mechanism to absorb every experiment at the end.
Nita documented the project across her progress update, finished-build post and two practical discussions covering her early build notes and detailed Space Shuttle tips. Together, they turn a striking finished model into a useful record of how it was achieved.

Creative build and photography by Robotime Community member Nita Davis. This project contains personal modifications and additional materials that are not included with the original ROKR Space Shuttle kit.


Robotime Creative Team
As Robotime's earliest audience and testers, they start from user needs and are dedicated to sharing stories and insights about the brand and its products.
Robotime is a creative lifestyle company dedicated to designing and developing 3D puzzles, toys, and wooden handicrafts. Subscribe to learn more.
Enjoy Robotime building guides and creative inspiration?
Add Robotime as a Preferred Source on Google to see more of our latest stories in Search.
 Add Robotime to your Preferred Sources
Robotime Creative Team
As Robotime's earliest audience and testers, they start from user needs and are dedicated to sharing stories and insights about the brand and its products.
Robotime is a creative lifestyle company dedicated to designing and developing 3D puzzles, toys, and wooden handicrafts. Subscribe to learn more.




Leave a comment
This site is protected by hCaptcha and the hCaptcha Privacy Policy and Terms of Service apply.