

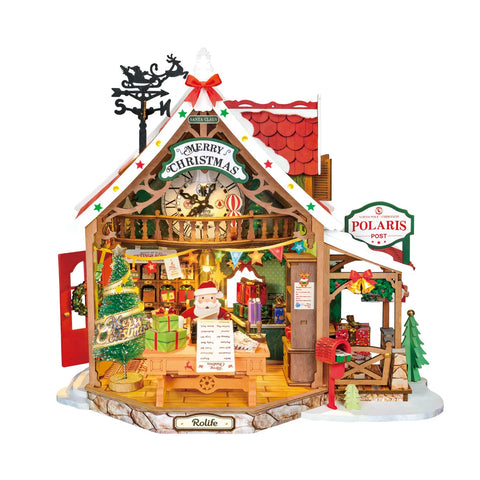



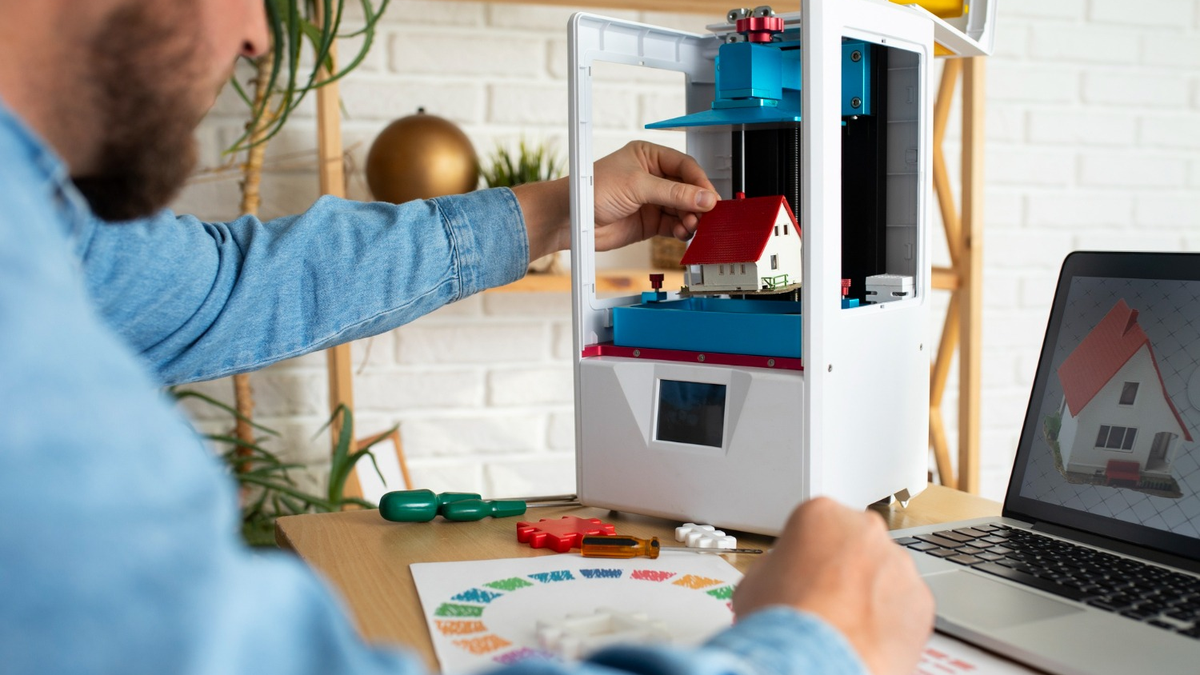
3D printing gives miniature-house builders a practical way to create furniture, signs, plants, figures, architectural details, and replacement parts that suit a specific scene.
The challenge is balancing scale, visible detail, printability, and strength. A well-chosen STL file still needs to be checked, scaled, test-printed, and finished before it looks at home in a miniature scene.
What Miniature House Accessories Can You 3D Print?
Some examples of common objects are: chairs, tables, shelves, lamps, plant pots, books, picture frames, kitchen items, signs, doors, windows, baskets, toys, and small figures.

Photo by Snapmaker 3D Printer on Unsplash.
3D printers can also be used to make replacement parts or custom parts for a particular scene. If the design is very small, use simple designs; otherwise, thin handles, legs, or frames may fail during printing or break during handling.
What Do You Need to 3D Print Miniatures?
The basic requirements depend on the type of printing you select, but as a beginner, you will need a 3D printer, the correct filament or resin, slicing software, and an STL file.
FDM printers are often the practical choice for larger, sturdier, or structural parts, while resin printers can capture finer detail on tiny decorative pieces and figures. Resin printing also requires more careful handling, washing, curing, and waste management. Choose the process according to the part, the detail required, your workspace, and the manufacturer's safety instructions.
The model is created using a computer or compatible device and slicing software. The slicer translates the 3D model into printer instructions and lets you tweak scale, layer height, supports, and more.
3D Printing Safety for Miniature Makers
Use the printer in a well-ventilated area and follow the printer and material manufacturers’ instructions and Safety Data Sheets. Keep hands away from hot nozzles, heated beds, moving parts, and uncured resin.
For resin printing, wear the recommended chemical-resistant gloves and eye protection, avoid skin contact, contain spills, and fully cure prints as directed. Do not pour liquid resin or contaminated cleaning solvent down the drain; follow local waste rules. Keep printers, resin, tools, and waste away from children and pets.
Where to Find STL Files for Miniature House Accessories
STL files can be found on 3D printing marketplaces, creator platforms, and free model repositories. Thingiverse, Printables, MyMiniFactory, and Cults3D are examples of platforms where 3D-printable models can be found.
Use a specific object and scale, for example, “miniature chair STL” or “dollhouse lamp STL”. Do check that the file has the correct dimensions and that its licence allows the intended personal use before downloading.
If you wish to make your own accessory that fits perfectly with your miniature house, you can also use 3D modelling software to create your own STL files.
How to Scale 3D Printed Accessories for Miniature Houses
Understanding scale is one of the most crucial parts of creating miniatures with 3D printing. If an accessory is excessively large or small, it can make the whole scene feel disproportionate.
The basic formula is:
Miniature measurement = real-world measurement ÷ scale denominator
For example, a 120 cm table at 1:24 scale should be 120 ÷ 24 = 5 cm wide. If the STL is modeled at full size and uses the same units, set it to about 4.17% in the slicer. For a model already made at another scale, use: source scale denominator ÷ target scale denominator × 100. A 1:12 model converted to 1:24 should therefore be set to 50%. Confirm the model's units and dimensions before printing.
Print a small sample and use it to compare the size and proportions with the furniture, doors, or figures in the area before printing the final version.
Step-by-Step Guide to 3D Printing Miniature Accessories
Choose an Accessory That Fits Your Scene
Determine the dimensions of the space the accessory will fit into, and consider the proximity of furnishings, doors, windows, and figures. Select an STL file suitable for your mini’s style and with enough detail to print reliably.
Find and Check the STL File
Download the STL from a reliable source and verify its size. Seek very thin, unsupported, or small features that may be hard to reduce in size.
Match the Scale
Calculate the target dimensions with the formula above. Enter either the target measurement or scale percentage in the slicer, and keep uniform scaling enabled so the proportions do not change.
Prepare the Model in Your Slicer
Import the model and orient it to protect visible surfaces, reduce unsupported overhangs, and avoid fragile contact points. Start from a tested profile for your printer and material, then adjust layer height, walls, infill, exposure, and supports for the model. There is no single setting that works for every printer, resin, filament, or miniature.
Preview the Print
Inspect the slicer's layer preview from bottom to top. Look for unsupported islands, missing thin features, weak first layers, trapped resin areas, and supports touching important surfaces. Then confirm estimated print time and material use.
Print a Test Version
If you're printing a small accessory or a small part of a larger accessory, make a test print first. This will allow you to see the size and proportions, as well as the overall look, before adding more material to the final version.
Clean and Finish the Piece
Carefully remove supports and clean the surface. FDM prints could be enhanced by light sanding, primer, and paint. Clean and cure resin prints according to the resin manufacturer's and printer manufacturer's instructions.
Place It in the Miniature House
Test-fit the completed accessory before installing permanently. Ensure it is to scale and will fit within the available space.
A Simple Example: 3D Printing a Miniature Chair
A simple chair is a useful first project because its width, seat height, legs, and back are easy to compare with existing furniture and figures.
If the space available for the chair is 4 cm wide and the scene is 1:12 scale, then the actual chair would be 48 cm wide, because 48 ÷ 12 = 4 cm. If the STL represents the original size of the chair, then in the slicer, set the uniform scale to approximately 8.33%.
After scaling, inspect whether the legs and back remain thick enough to print and handle. Make a test print, place it beside the existing furniture, and check both fit and visual proportion. Once it looks right, print the final piece, remove supports carefully, smooth rough areas where appropriate, then prime and paint it.
This project illustrates the process of measuring, calculating, scaling, slicing, testing, finishing, and fitting the accessory.
3D Printed Miniature House Accessory Ideas from the Robotime Community
Kim Kieffer customized the Century Post Office with a blue 3D-printed USPS mailbox in place of the kit's standard red mailbox.


Original and customized mailboxes. Photo: Kim Kieffer · Original post
Community builder mchipman added two 3D-printed and hand-painted figures to the Nostalgic Corner Shop, giving the finished scene a shopkeeper and customer.


Finished scene and printed shopkeeper detail. Photo: mchipman · Original post
Melissa Palus transformed the Corner Bookstore into an autumn market with a 3D-printed stall, crates, apples, and book-shaped light-pole planters.


Official Corner Bookstore scene and customized market detail. Photo: Melissa Palus · Original post
Together, these projects show how 3D printing can add replacements, characters, and scene-specific details to a miniature build.
If you want to furnish or refresh a miniature scene without designing every part from scratch, the Rolife Fun Pieces collection offers ready-made frames, furniture, appliances, plants, and decorative details that can complement custom-printed pieces.
Common Problems When 3D Printing Miniatures
Tiny Details Disappear
Increase feature size where possible, use a suitable print resolution, or remove unnecessary detail.
Prints Break Easily
Thin legs, handles, stems, and other small or fragile components can break when removed or handled.
Supports Damage the Surface
Rotate the model or change the supports so that supports are minimized or placed away from important visible surfaces where possible.
The Accessory Does Not Fit
If an accessory is not the right size, it will look unnatural in the miniature. Before printing the final version, verify the house’s scale and match it to the objects around the house.
Surface Lines or Roughness Show
On small decorative items, the layer lines or roughness might be more prominent. Sand and prime the surface and paint for a smoother finish.
Colours Do Not Match
Paint the completed accessory to complement the colors of the miniature house, furniture, and other details.
FAQs
Can You 3D Print Furniture for Miniature Houses?
Yes. You can print furniture such as chairs, tables, shelves, beds, and cabinets.
What File Do I Need for 3D Printing?
STL is one of the most widely used file formats for preparing 3D models for printing.
Is FDM or Resin Better for Miniature Accessories?
FDM is often suitable for larger, stronger, or structural parts; resin is usually better for very small figures and fine decorative detail. The better choice depends on the model, finish, workspace, post-processing, and safety requirements.
How Do I Convert an STL from One Miniature Scale to Another?
Divide the source scale denominator by the target scale denominator, then multiply by 100. To convert a 1:12 model to 1:24, use 12 ÷ 24 × 100 = 50%. Confirm the file units and final dimensions before printing.
What Is the Best Printer for Miniature Accessories?
This depends on the accessory. FDM printers can be used for simpler or more robust parts, while resin printers might be more appropriate for extremely fine details.
How Do I Know if a 3D-Printed Accessory Is the Right Size?
Compare the accessory with the miniature house and surrounding objects. Before producing the final print, use the scale formula to determine the dimensions and make a test print.
Can You Make Your Own STL Files for Miniature Accessories?
Yes. Custom STL files can be made using 3D modelling software if you require an accessory that isn't available in a ready-made STL file, or if you need an accessory with a particular size, shape, and/or design.


Laraib Shahzad
Laraib is a freelance writer who specializes in creating clear, engaging, and research-driven content.
Robotime is a creative lifestyle company dedicated to designing and developing 3D puzzles, toys, and wooden handicrafts. Subscribe to learn more.
Enjoy Robotime building guides and creative inspiration?
Add Robotime as a Preferred Source on Google to see more of our latest stories in Search.
 Add Robotime to your Preferred Sources
Laraib Shahzad
Laraib is a freelance writer who specializes in creating clear, engaging, and research-driven content.
Robotime is a creative lifestyle company dedicated to designing and developing 3D puzzles, toys, and wooden handicrafts. Subscribe to learn more.


Leave a comment
This site is protected by hCaptcha and the hCaptcha Privacy Policy and Terms of Service apply.