

Editor's Note: This is a review post about the ROKR Classic Printing Press (LK602), originally posted by @buildingwiththeboys. We have compiled and summarized the contents mentioned in the video to objectively and impartially review this product for everyone.
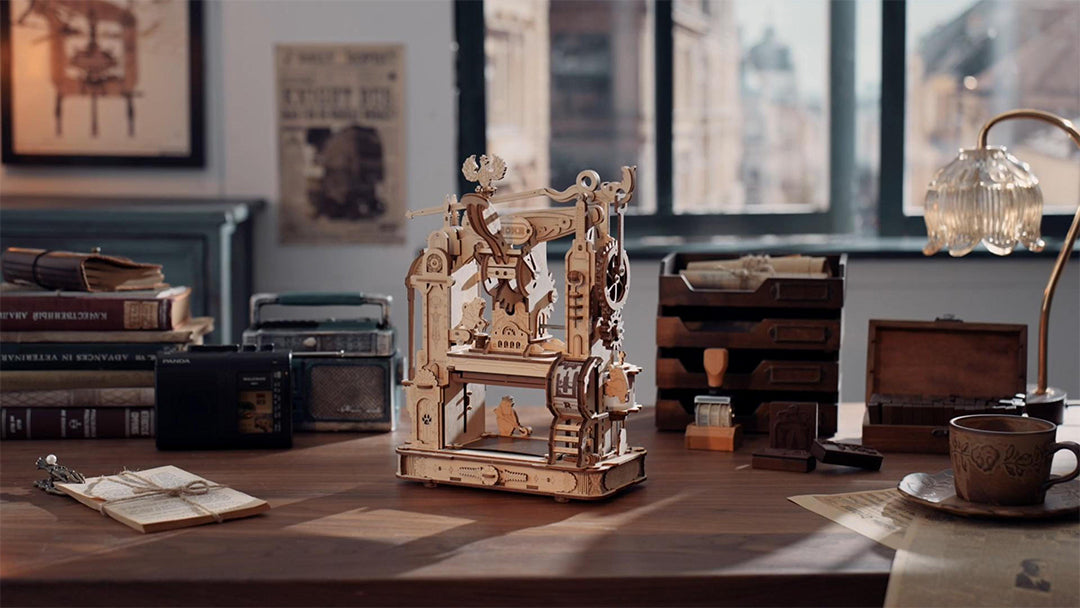
For your next building project, get hold of the ROKR Classic Printing Press. This 3D wooden puzzle kit transforms into the Little Bear Print Factory’s moveable-type printer. With a press of the handle, the cute little bear workers will spring into action. You’ll know the printing process is complete once the workshop lights up.
It ticks all the boxes from an enjoyable 3D model building experience to a functional project that you can use in your other crafts, all wrapped up in an adorable display piece. It even features a customizable letterpress plate as well as a self-inking mechanism for versatility and ease of use.
Details
- 303 pieces
- About 5 hours of assembly time
- Difficulty level: ★★★★
- Assembled size: H:8.5"(21.5cm) x W:5.7"(14.5cm) x D:10.6"(27cm)
- Free international shipping for orders over $65
- 30-day risk-free return policy
- Comes with plenty of spare parts in case of breakage
- Assembly tools included
- Free parts replacement service
- Requires 2 pcs of AA 1.5V batteries
- Comes with a detailed instruction manual and labeled parts for smoother assembly
Features
- Light Effects - The ROKR Classic Printing Press lights up once the printing is done.
- Customizable Letterpress Plate- You’ll get multiple pieces of each rubber letter, allowing you to easily compose your desired message. Aside from the alphabet, you’ll also get numbers, text faces, and emojis.
- Self-Inking Mechanism - This 3D wooden puzzle doesn’t require manual re-inking, ensuring ease of use.
- Easy Fit - Your 3D model building experience will be much easier since you don’t need glue to assemble this. The parts have been precisely laser cut to ensure a perfect fit.
- Paper Storage- This movable-type printer comes with a functional drawer where you can store sheets of paper.
- Adorable Bear Workers- Upon pressing the handle, the bear workers come to life to help print your message.
- Hidden Ink Box- The ink box is cleverly hidden to maintain a clean aesthetic.
- Water-Based Ink- This kit comes with an already filled ink cartridge. Once it runs out, you can easily re-fill it with any water-based ink. Since it’s water-based, it’s also easy to clean up any stains or smears.
- Beautiful Wooden Aesthetics -The ROKR Classic Printing Press has the natural beauty of wood. That said, you also have the option to paint it to match your desired look.
Assembly Tips
- Some international orders might not come with glue and batteries due to customs policy. In this case, please check your local craft stores for wood glue and AA batteries.
- Before beginning the assembly, check if the included light bulbs actually work. This way, if you have lighting issues later on, you know that it’s because of the wiring.
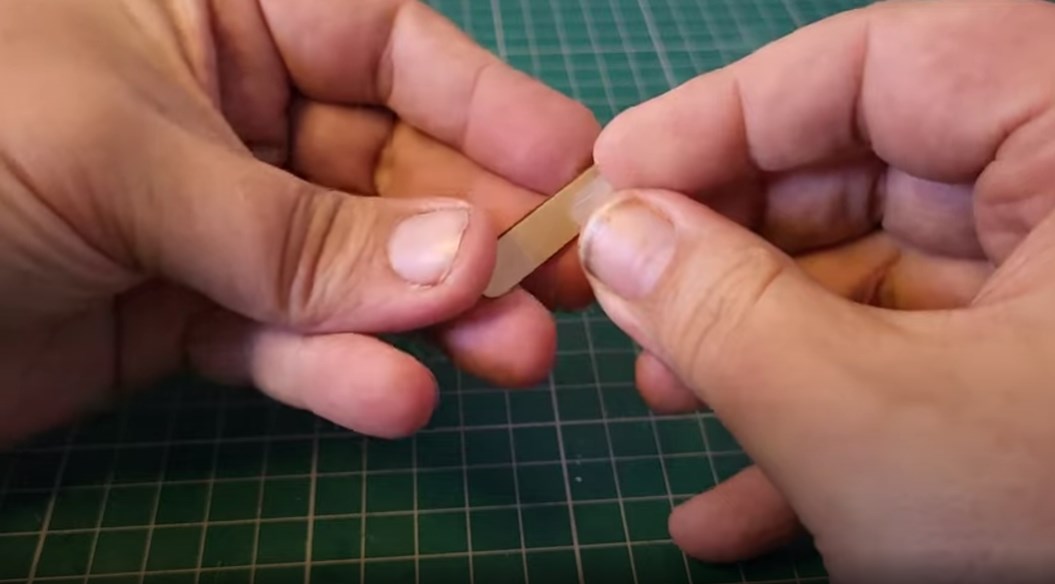
- If sprues are preventing the parts from fitting properly, you can use sandpaper to clean them up.
- Ease the parts into their dedicated holes instead of forcing them in to avoid breakage.
Assembling the ROKR Classic Printing Press
I’ll be going through the assembly of the ROKR Classic Printing Press and also review it in the process. As always, I’ll be focusing on the difficult parts like the electrics to help you get through them. Robotime also has some videos that can help you with the assembly.
Beginning the Assembly
Upon unboxing, I can tell right away that this is going to be fun because there’s a lot going on.
The first thing I built is a tool that I really love with Robotime kits. It’s very useful for things like pushing in washers and whatnot.
One of the first things that you’ll need to do is wax the parts so you don’t end up with stiff mechanisms.
Then, I assembled the worker bear with the roller brush. Putting it together is quite straightforward. What makes it difficult is the small size of the parts. Once I’ve put together the bear, I generously waxed the underside of the frame where he’ll be sitting.
This piece will be moving so you need to give it a generous coating of wax to prevent a jerky mechanism. It will also make slotting the bear in much easier.
Building the Base
With the base’s printed side up, slot in C2 and C1 in their tabs. Then, take A1 and place it over the base as I’ve done. Take the bear with the roller brush and insert it in the specified channel where he’ll be going backwards and forwards.

Turn the base over and put the A7 pin in to hold the bear in place. Next, grab one of the springs and hold it in place, not tightening it, with a screw. Pay attention to which side of the spring you’re working on. Pull the other side of the spring to the indicated hole and screw it in place. This time, tighten it.
Adding the Electrics
Take the electric unit and put two batteries inside. You can test if the batteries are working by turning the electric unit on and pressing the switch to make the bulb light up.
The switch and short wire need to go through the large square hole at the back of the base. Screw the switch in place as I have done in the video.

The wires go through the channel under the base where they’re nicely held by the C10s and A11. Then, you take your battery box, flip it so that the box is facing outwards, and fit it over the channel where your wires went through.
Now, take the long wire and insert it into the designated hole. The long wire will be held in place with A8 clamps to keep them neat and tidy.

Add the elements on the bottom of the base. They’re nothing complicated since they’re push-to-fit. At this point, the base is pretty much complete with four screws holding them in place and silicone stoppers as well to prevent this 3D wooden puzzle from slipping around.
Working on the Actual Mechanism of the Printing Press
Set aside the base for now. Put together the press handle. Again, easy to do since the parts are just push-to-fit. The pin bar goes through the middle and is held in place with some screws. Make the rest of the gears that attach to this one to create the lever for the press. Don’t forget to wax the gears as you go to make them move smoothly.
Building the Frame
Next, assemble the plate and arms. Add the plate to the mainframe. I made more gears and installed them as well. There’s an unusual piece with a hanging gear which I’ve screwed in. I’ve also waxed the teeth.
I added the central bar as well as its gears which I’ve waxed as well. Then, I added the section that frames the side. It looks very ornate and pretty. I attached the lever, gears, top piece, and string as well.
I also added the clock face, bit of roof, and embellishments. I love how ROKR takes something functional and turns it into something lovely.

The string goes through the tube and straight down and through so that when you straighten it the tube sits properly. Put the string back in and under the rod. Pull it out the way I did all the way through.

Then, keep it nice and tight by wrapping it twice around the screw and tightening the screw. Trim the excess string.
So, what should happen now is when you push the lever, the bear with the rolling brush should move.
I moved on to building the drawer and attaching it as well as the ink cartridge and leather bit.
After this, the ROKR Classic Printing Press is ready to start printing.

Look that, it's stunning! It's so nice, you can see the lights all light up! It's definitely printed. You can see it movements that are happening as well.
Final Words
The first time I tried printing, I was stunned. The lights are beautiful and it’s so fun to see this 3D wooden puzzle actually work. There are so many things going on like the bear moving to seemingly pour some ink, another bear with the rolling brush moving, a paw print and the honey pot lighting up, and the unique piece at the top with the bird lifting up.
The detailing on this is superb. It looks really good and I’m really happy with it. I love how you can change the text on the printing plates as well so you can use it to create greeting cards and other things.
All in all, it’s a magnificent project. The way it moves is gorgeous. I love how it lights up. Plus, it’s a big functional unit that looks ornate. So, it’s both practical and attractive.
I took my time building it so it took me six-and-a-half hours. That said, it’s a joy to build with the smooth 3D model-building experience and clever mechanisms.
ROKR and Robotime are genuinely quality products. They are a brand I trust.
I highly recommend the ROKR Classic Printing Press since everything about it is fun from assembly to actual use. It’s one of my favorites out of all the ROKR kits I’ve built, along with the amusement park. It’s absolutely gorgeous and fun to build.

Robotime Creative Team
As Robotime's earliest audience and testers, they start from user needs and are dedicated to sharing stories and insights about the brand and its products.
Robotime is a creative lifestyle company dedicated to designing and developing 3D puzzles, toys, and wooden handicrafts. Subscribe to learn more.


,%20originally%20posted%20by%C2%A0@buildingwiththeboys.%20We%20have%20compiled%20and%20summarized%20the%20contents%20mentioned%20in%20the%20video%20t...)
1 comment
I have three of these models Train, Racing Car and vintage racing car.
John Welch
Leave a comment
This site is protected by hCaptcha and the hCaptcha Privacy Policy and Terms of Service apply.