




A Christmas village rarely begins as a village. It may start with one glowing shop on a shelf, a miniature house saved from an earlier build, or an empty corner that suddenly looks ready for snow.
Across the Robotime Community, Jill Francisco, Tricia12, Audrey, and Atropex have each arranged Robotime kits into festive displays of their own. Some fit above a television; another fills a window; others gather a year of building into one illuminated scene.
Together, their villages show that the most convincing display does not depend on owning the same set of buildings. It comes from choosing the right location, creating a visual center, repeating light and seasonal details, and leaving enough room for the collection to grow.
Choose the Village Location First
Before selecting buildings, decide where the finished village will live. The available surface determines its depth, viewing angle, electrical access, and how much empty space can remain between individual kits.
Jill began with a clear destination: a shelf above the family television. Her early setup established the width of the village before every element was finished. When the completed display appeared later, its buildings and lights felt planned for that long horizontal space rather than squeezed into it.


A shelf works well for a compact street, while a tabletop gives larger pieces more breathing room. A windowsill adds reflections and visibility from outside, but it also favors a composition that reads clearly from a distance. Measure first, then reserve room for cords, switches, and any centerpiece you hope to add later.
Build Around an Anchor
Every village benefits from one element that gives the eye somewhere to land. That anchor might be the tallest building, the brightest storefront, a tree, a book nook, or a small cluster of houses placed close together.
Atropex arranged most of the year’s Christmas builds across a television stand and immediately noticed what the composition was missing: enough central room for the Melody Christmas Tree. That observation is useful even before a collection grows large. Place the biggest or most distinctive kit first, then let smaller houses, shops, and decorative builds support it.

An anchor does not have to dominate every view. Its job is to organize the village. Once it is in place, vary the surrounding heights and avoid lining every facade up at exactly the same depth.
Mix Different Robotime Kits into One Scene
A Christmas village can include more than miniature houses. Robotime kits with different architectural styles, scales, and functions can still belong together when the arrangement repeats a few visual cues.
Tricia12’s window display combines Western- and Eastern-inspired buildings with glowing windows and lanterns. Instead of forcing every structure to match, the display lets light, rhythm, and the shared holiday setting do the unifying work. This opens the door to combining Rolife kits, selected ROKR builds, and seasonal decorations without making the village feel like a product lineup.


Choose two or three recurring features—warm light, snowy ground, evergreen trees, red accents, or similar spacing—and repeat them across the display. Those shared details allow individual kits to keep their own personality.
Connect the Village with Light
Lighting is one of the simplest ways to make separate builds feel like one place. When several windows glow at related brightness levels, the eye reads them as parts of the same evening scene.
Both Jill’s shelf village and Tricia12’s window display rely on illumination to connect buildings that differ in shape and style. Test every kit before final placement, hide battery boxes where they remain reachable, and group switches so turning on the village does not require dismantling it.
Balance matters more than maximum brightness. A single intense light can flatten nearby detail, while several softer points create depth. If one building is much brighter than the rest, move it toward the center as a focal point or soften its surroundings with nearby trees and decorations.
Add Landscape Between the Buildings
The spaces between kits are what turn a collection into a village. A narrow path can suggest movement from one shop to another. Faux snow can disguise separate bases. Trees, signs, figures, and small ornaments can bridge changes in scale.
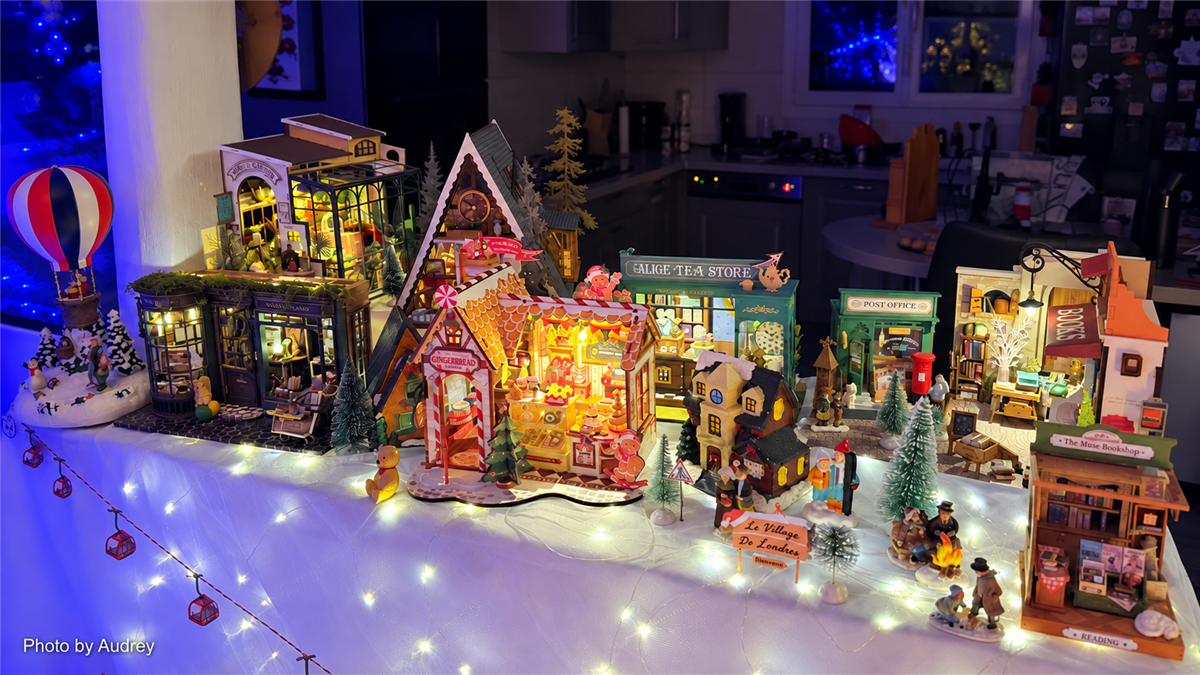
Audrey gathered a year’s worth of miniatures into one family Christmas display. The larger arrangement works because the viewer can read both the whole scene and smaller neighborhoods within it. Wide views establish the village, while closer angles reveal how individual structures contribute to the atmosphere.


Begin with temporary materials before committing. Folded white fabric or loose batting can test the look of snow; paper strips can map paths; boxes hidden beneath the surface can create gentle elevation. Keep added materials clear of vents, lights, switches, and moving mechanisms.
Leave Room for the Village to Grow
A Christmas village can be an annual project rather than a one-season purchase. Tricia12 was already thinking about kits for the following year. Audrey’s village represented a full year of building. Atropex realized that the next version might need an entire table.
That gradual growth is part of the appeal. Photograph the arrangement before packing it away, note which areas felt crowded, and record where cords or switches were difficult to reach. Next year, you can rebuild the parts that worked and change the rest.
Start with the surface you have and the Robotime kits you already enjoy. Choose one anchor, connect the pieces with light and landscape, and allow the village to develop at its own pace. The most memorable displays are not necessarily the largest—they are the ones that make separate builds feel like neighbors.
Explore the original Community posts: Jill’s starting layout and finished village, Tricia12’s window display, Audrey’s year-long collection, and Atropex’s Christmas village.
Christmas village builds and photography by Robotime Community members Jill Francisco, Tricia12, Audrey, and Atropex. Displays may include personal arrangements, decorations, and materials that are not included with the original Robotime kits.

Robotime Creative Team
As Robotime's earliest audience and testers, they start from user needs and are dedicated to sharing stories and insights about the brand and its products.
Robotime is a creative lifestyle company dedicated to designing and developing 3D puzzles, toys, and wooden handicrafts. Subscribe to learn more.
Enjoy Robotime building guides and creative inspiration?
Add Robotime as a Preferred Source on Google to see more of our latest stories in Search.
 Add Robotime to your Preferred Sources
Robotime Creative Team
As Robotime's earliest audience and testers, they start from user needs and are dedicated to sharing stories and insights about the brand and its products.



Leave a comment
This site is protected by hCaptcha and the hCaptcha Privacy Policy and Terms of Service apply.