

Editor's Note: This is a review post about the Rokr Pinball Machine, originally posted by @outsider238 on YouTube. We have compiled and summarized the contents mentioned in the video to objectively and impartially review this pinball machine for everyone.
Description
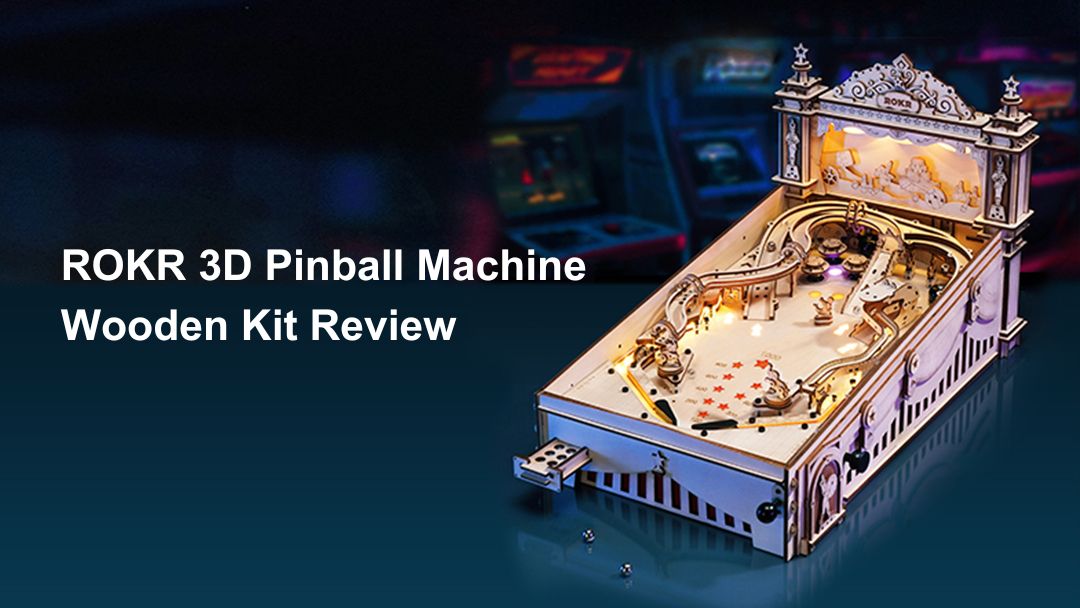
Relive the fun time you spent with your friends in the arcade in the ‘90s with the ROKR 3D Pinball Machine Wooden Puzzle. If you’re up to the task of building this wooden puzzle kit, you’ll be rewarded with a vintage-style scale model of the pinball machine with electronic scoring and engaging light and sound effects. Challenge your family and friends to find out who can score the highest and create happy memories in the process.
Details
- 482 pieces
- About 12 hours of assembly time
- Difficulty level: ★★★★★★
- Package size: L18.50 x W12.13 x H3.9 inches (L470 x W308x H99 mm)
- Assembled size: L11 x W18.7 x H10.8 inches (L275 x W475 x H280 mm)
- Including 6 pieces of eco-friendly nickel-plated carbon steel pinballs, each measuring 11mm.
- Free international shipping
- 30-day risk-free return policy
- Comes with plenty of spare parts in case of breakage
- Assembly tools included
- Free parts replacement service
Features
- Mortise and Tenon Assembly - This DIY pinball machine uses mortise and tenon to create strong joints that are also pleasing to the eye.
- Live Sound and Light Effects- Cleverly placed colorful LED lights and fun sound effects create engaging gameplay that’s reminiscent of the arcade.
- Star Score Display- With proper installation and an appropriate power block, this homemade pinball machine can keep score while playing. There’s no score display. Instead, the stars in the middle will light up one by one each time you score 100 more points, up to 1000 points. Note that the game resets once you hear the fanfare music and you reach 1000 points.
- Mini Drawer- There’s a small compartment at the side where you can store the pinballs.
- Manual Flippers- With just a push of a button, you can control the flippers and save the pinball from falling.
- Ball Launcher Control- Adjusting the pull rod’s power and direction will let you control how fast and where you want the ball to go.
- Targets with Different Points- Different targets will give different points. Aim for the targets that are harder to hit to score more points.
- Retro Circus Theme- A festive scene with various arches and ramps, cute animals, and musical tin soldiers awaits you. A beautiful tent top with a background showing a scene with a cannon and beach ball completes the picture.
Assembly Tips
- Electromagnetic ejection area aside, you’re free to paint this DIY/homemade pinball machine the color palette of your choice.
- If your game keeps resetting while you’re playing, change to a power block that’s 5 volts and 2 amps.
- For the parts where you need to bend the wood, try steam-bending them to make them more pliable. This will especially help with the snake head which has a very sharp curve.
- If you’re having trouble assembling the playfield, check out the step-by-step tutorials that Robotime has on their YouTube channel. They’re compiled in a playlist called ROKR 3D Pinball Assemble Guide.
How To Assemble the ROKR 3D Pinball Machine Wooden Kit
Here’s how I assembled the ROKR DIY/homemade pinball machine. Note that this isn’t an in-depth guide since you have the manual for that. Instead, this is more of a summary with some tips to help you have a smoother assembly time.
Putting Together the Backboard
You’ll find little to no trouble assembling the backboard. The parts fit well and it was surprising to see how detailed the decorations of the front and back are. There’s something like a bowling alley diorama in the front. Meanwhile, the back has this beautiful circus wording along with little toy soldiers and clowns.

Behind the upper drapes of the backboard, there’s a strip of light that you’ll need to attach with some hot glue. If you don’t have hot glue, some double-sided tape can do the job though it might dry out eventually. You can also put some glue on sections of the backboard where you think there might be more stress. But, for the most part, the backboard went together really well, even without glue.
Next, assemble the side panels, the front part of the cabinet with the speaker, and the front panel, which has the balls compartment and plunger.
Working on the Playfield
The little round inserts on the playfield are quite tricky since you need to make sure that they’re going in perfectly straight. The key is to push them flat so there’s even pressure. They have a small tool for this, but I found that using my metal ruler works better.
The arrow and star inserts are easier to put in. Once inserted properly, you’ll be amazed at how well-engineered this DIY/homemade pinball machine kit is. The inserts feel so smooth and even on the surface. This is very important since even the smallest bumps and dents can change the course of your balls.

Next, attach the bumpers along with the darker contact fabric. When the ball touches this piece of fabric, the bumpers will go down quickly to push the ball out. There are also some metal bells in there which will sound really good once the ball hits them.

As for the bumpers next to the star score display, make sure to use the taller clear spacers. The posts, which are hard to put in, use the shorter clear spacers. You’ll be threading in a lot of these little posts which can tire your hands out.
Just like the posts, the ramps can be tough to put in. There are so many pieces that support each other and some parts keep trying to come off. You’ll definitely need a lot of patience when working on this section of the playfield.
The rails are fragile so you’ll need to be extra careful when handling those. Though, you do get plenty of spares, just in case.
Going Over the Electronics

As for the electronics on the backside of the playfield, there are no tricks here or shortcuts. Just follow the instruction manual carefully to stay on the right track. I like that there are little wooden pieces for wire management, so the wires don’t just hang there.
Also, you need to twist the longer light strip under the playfield when threading it so that the light shines down. Otherwise, the side decorations won’t light up.
Now, all that’s left is to seal the bottom, and you’re good to go!
Final Words
The ROKR 3D Pinball Machine is definitely not for beginners. Between the little clear posts, ramps, and arches, the assembly was intense. That said, this is a very well-engineered kit. The laser-cut pieces fit well. The magnetized screwdriver works brilliantly for the small screws.
There are a couple of things I’d love to see included in this kit. First, a switch at the back, near the plug, would be a good idea, so you won’t have to unplug this DIY/homemade pinball machine after every game. A plexi top would also be a nice addition since, without a cover, keeping the dust off will be a challenging task.
I am floored by how amazing it looks for a wood kit. There are so many wonderful details, and the playfield has so many cool things going on. Plus, the LED strips all over that light up the playfield are a really cool feature.
All in all, this is the most awesome ROKR kit that I’ve tried. The assembly went well, even with the more difficult sections. Everything just fit together so well, and there were zero issues. You just know that ROKR did their homework on this one.
More Product Review Posts

Robotime Creative Team
As Robotime's earliest audience and testers, they start from user needs and are dedicated to sharing stories and insights about the brand and its products.
Robotime is a creative lifestyle company dedicated to designing and developing 3D puzzles, toys, and wooden handicrafts. Subscribe to learn more.


2 comments
Herzlichen Dank an den Hersteller!
Die Qualität der Ware, die Organisation der Schnittmuster, die elektronischen Bauteile, der Bauplan, die mitgelieferten Werkzeuge
sind auf allerhöchstem Niveau. Herzlichen Dank an China, wenn mir auch der Preis viel zu niedrig erscheint und ich mir beim besten Willen nicht vorstellen kann, wie der Hersteller auf lange Sicht seine Kosten decken kann.
Danke!!
Sebastian Jäger
How much does it cost 3D Pinball Machine Wooden Kit ?
Leonardo Oliveira
Leave a comment
This site is protected by hCaptcha and the hCaptcha Privacy Policy and Terms of Service apply.