


Rolife Garden House DIY Book Nook Kit Review
Editor's Note: This is a review post about the Rolife Garden House Book Nook, originally posted by @buildingwiththeboys on YouTube. We have compiled and summarized the contents mentioned in the video to objectively and impartially review this product for everyone.
The Rolife Garden House book nook features a dreamy French glasshouse where elegance meets warm relaxation. Layers of draping wisteria will watch over you as you destress in your comfy rocking chair. At night, you can bask in the warm light as nature’s wind gently blows in from the open window. This is a book nook kit that will charm you with its vibrant colors and whimsical retro elegance.
Details
- 176 pieces
- About 5 hours of assembly time
- Difficulty level: ★★★★
- Assembled size: H:8"(20.3cm) x W:4.3"(11cm) x D:9.5"(24.1cm)
- Free international shipping for orders over $65
- 30-day risk-free return policy
- Comes with plenty of spare parts in case of breakage
- Assembly tools included
- Free parts replacement service
- Requires 2 pcs of AAA/LR03/AM4 1.5V batteries(Not included in the package; you need to prepare yourself)
- Comes with a detailed instruction manual and labeled parts for smoother assembly
Features
- Premium Build- The Rolife Garden House book nook uses eco-friendly, durable, and corrosion-resistant wood that has been precisely cut using a laser cutting machine for secure parts.
- Pre-Colored - A French pastoral color palette has been used to pre-color the parts to create a cohesive and enchanting rustic display.
- Glass-Like Greenhouse- The transparent PET material used perfectly recreates glass used in French flower houses.
- Warm and Soothing Lighting- This also features an LED flower chandelier and tall lamp which light up to envelop the Garden House in a cozy glow.
- Hidden Battery Box- The battery box has been cleverly hidden to preserve the aesthetics of this DIY book nook.
- Interactive Element- The window can be opened, encouraging imaginative play.
- Authentic Atmosphere- The furniture, home decorations, and gardening tools create a realistic and homey atmosphere that’s perfect for relaxation.
- Natural Beauty- The fourteen types of vibrant flowers in this book nook kit make it a true garden house. This includes the artfully layered wisteria that seemingly watches over its owner.
Assembly Tips
- Because of customs policy, international orders might not include glue, and batteries. Please visit your local craft stores to buy wood glue and AAA batteries.
- Before the assembly, check if the included light bulbs actually work so you know that any lighting issues later on are due to the wiring. Simply remove the covers from the ends of the wires of your light bulbs. Touch the end of the red wire to the bottom side of a button cell battery and the black wire’s end to the upper side to see if the bulb lights up.
- Use sandpaper to clean up sprues so the parts fit properly.
- When slotting in the parts into their dedicated holes, don’t force them in to avoid breakage.
Assembling the Rolife Garden House Book Nook
Follow me as I go through the steps of assembling the Rolife Garden House Book Nook kit. This is my sixth Rolife book nook, with the previous ones being Time Travel, Magic House, Sakura Densya, Sunshine Town, and Falling Sakura. As always, I’m not going through the entire building process but will go into detail when it comes to the more confusing parts like the lighting.
Starting the Assembly Process
First, take parts B11 and A1. Be careful when popping out the pieces from the wooden boards to avoid breaking them. Take B11 and fit it into the dedicated holes in A1. Next, get the base which is on the C board and attach the joined B11 and A1 to it. Follow the steps indicated in the instruction manual to put together the lovely little steps that go up and down the back wall. At this point, there should be nothing left on your C board.
Then, get the pieces to the door and add small beads of Rolife’s glue, which I really love, to the door’s window. You won’t need much and the more you add, the messier it will just get. That said, messy is not so bad in book nooks such as this since we’re not striving for perfection but a lived in effect instead. Plus, the glue dries clear.
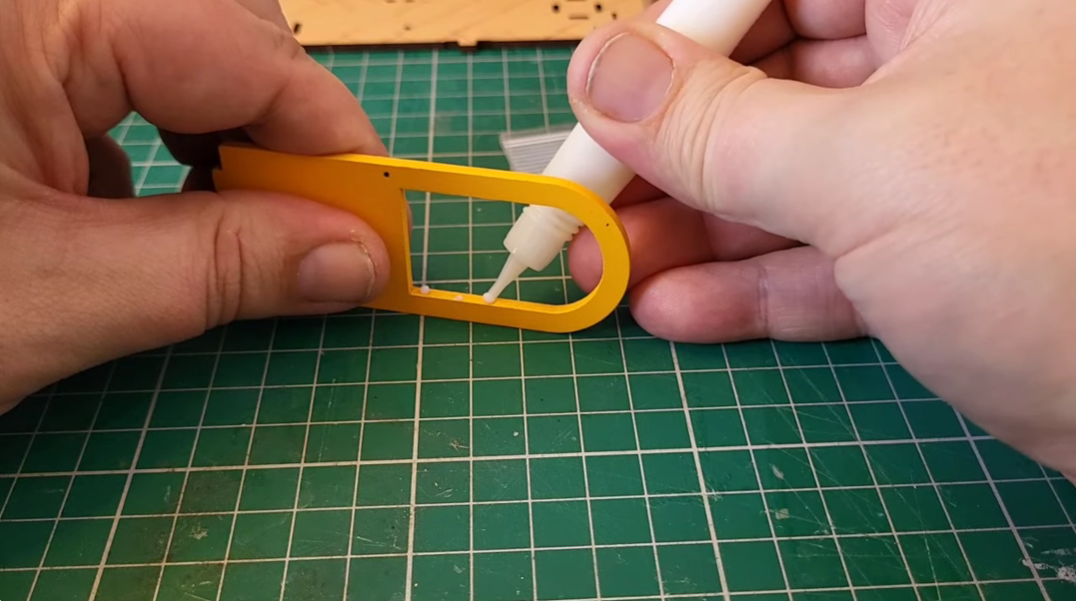
Spread the glue along the edge. Then, slot the piece in the glass and let the glue do its job. Add a splodge of glue on the end of the door handle and pop it in the hole. Clean up the excess glue
Once that’s dry, add the card elements from the F card to bring it to life. Put a small amount of glue onto the card elements and lay them down on the outlines on the door, avoiding putting glue on the glass. After it dries, slot the door’s pin in the slanted holes on the upper floor.
Next, take your two A24’s and slot one of their pins in beside the door as I’ve done in the video. As for the A28, fit it on the end hole. Grab the rest of the parts of the drawer and slot them in between the two A24’s.
Slot in the decorative elements like the plants, planter, and watering can that go on top of the yellow drawer as well as the potted plant that goes beside it. This main structure now becomes part A.
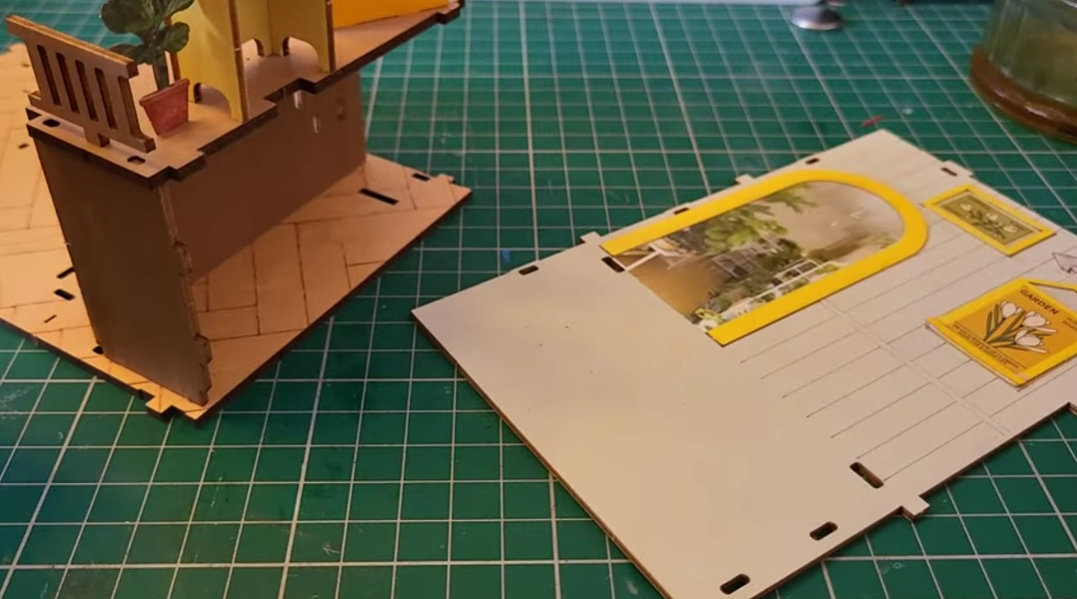
Working on the Back Wall and Sides
Take the sticker sheet and install the large bit. The adhesive, by the way, feels just right so I don’t think it will peel off. Get it as straight as possible in one go. Take F20 to create a frame around the sticker you just put on. Again, just put enough glue to hold it in place.
Do the same for the arrow and two frames. Attach the back wall to part A. This main structure now becomes part B.
Put together the blue side panels and attach its decorations. Slot the side panels on the back wall and push them down so they’re flush against the floor.
Now, build the front of the blue cabinet and decorate it with the stickers. Assemble the potted plant that goes beside it which is really simple to make using the tool that they provided. Same with the lovely yellow stand which has card and sticker details that need to be added. They’re mostly push-to-fit though I glued the books down in place.
Take the electric parts from bag 3 to create the lamp. Put the rubber washer on the end of the rod and thread it through about halfway. Push the wire all the way through. Continue assembling the lamp according to the instructions.
Work on the pot and shelf and use some of the plastic flowers for detail.
So far, I love how detailed it is. I’m actually incredibly impressed with this one which I didn’t think I would be. It’s also going together really easily compared to the book nook kits that I’ve done before. I love how the Rolife Garden House Book Nook kit gives you what I like from projects like this which is to have so many details to explore everywhere you look.
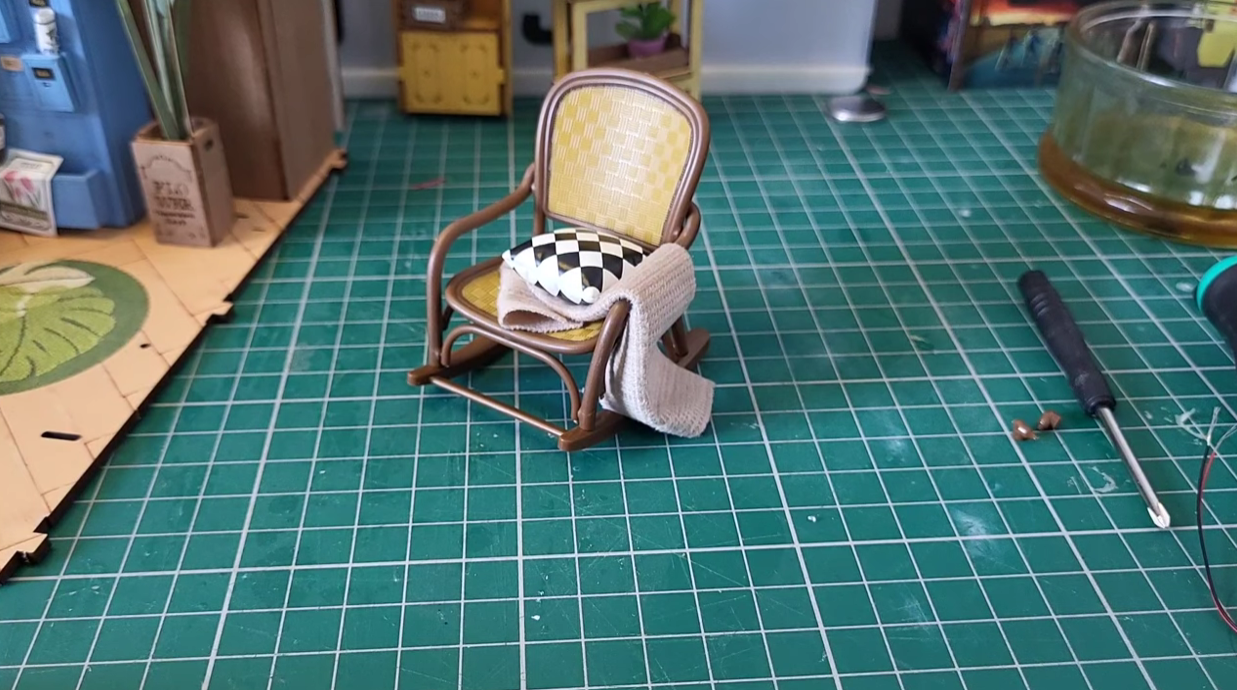
Putting the Rocking Chair Together
Clip off the three parts from the first piece as shown in the video. Attach the back of the chair to the rocking base. Do the same for two of the pieces that you clipped off earlier.
Next, attach the armrests and the remaining clipped-off piece which goes on the front. Attach the seat as well.
Put together the cushion which you can glue together just as the instructions says though I simply pressed them together. Arrange the cushion and blanket on the seat. The fabric will be firm right out of the box but you can moisten it slightly to make it more manageable.
Attach the flower pot, shelf, and lamp to part B.
Working on the Roof and External Frame
Assemble the ceiling panel and add the wisteria. Trim the tube to the correct size using the included ruler and push the wire in. It’s just hanging down for now though it will get some rigidity later on.
Next, I worked on the glass side panel and roof. Basically, you just need to put the plastic decal over and lock it into place with the side or roof panels.
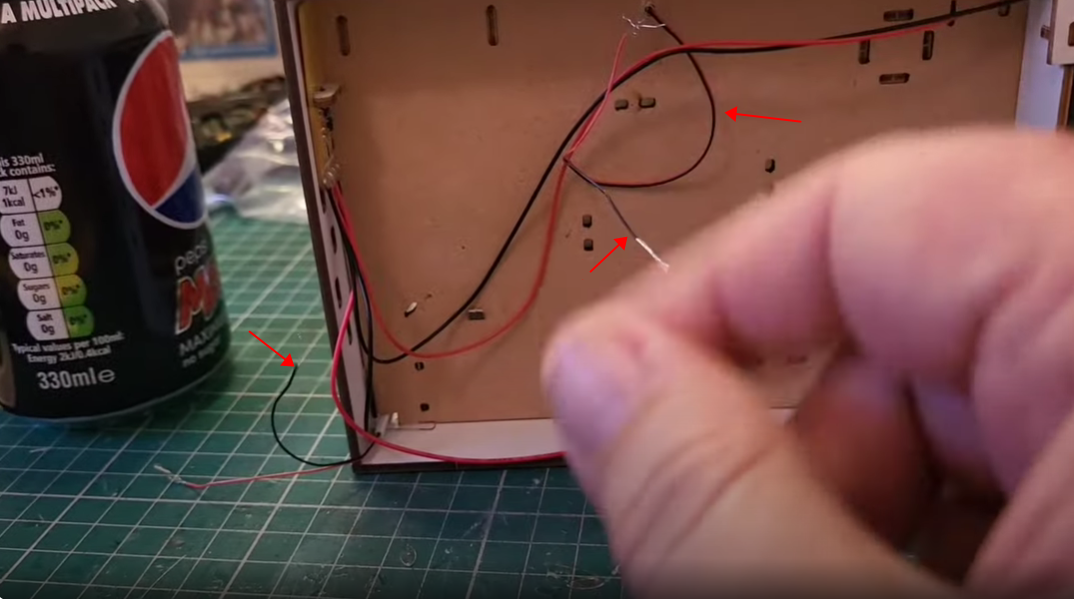
On to the Wiring
Finally, put together the battery box and install it on the bottom of the book nook. Take the ends of the three black wires, twist them together, and tie a piece of electrical tape around them. Do the same thing with the three red wires. Though it might be intimidating, it really is quite simple.
And, there you have it - the finished Rolife Garden House Book Nook!
Final Words
The Rolife Garden House Book Nook looks absolutely lovely. I didn’t think I was going to like it and I was quite critical when it was released because it is more like the Rolife rooms compared to their other book nook kits that I've done before. I couldn’t be more wrong about that. I think the little things like the opening window are unique to it as well.
I found the glass sides a bit of an odd choice. As a book nook, when you place it on the shelf, you won’t really see through the glass sides. Though it probably works for those who want it as a standalone display.
Also, I was actually hoping that they would switch to plug-and-play since a lot of people have trouble with the wiring. Plus, it’s weird that they would instruct people to put all those details together then put it upside down for the wiring when it could have been done much earlier in.
The assembly took me about five hours compared to the other book nook kits which took me six to eight hours. It was ridiculously easy to build. By any means, it’s not dumbed down. It’s just the nature of what it is in that it goes together simpler. Plus, Rolife has used better techniques on this one which I didn’t see in the other book nook kits.
Overall, I love how it looks and I enjoyed building it so it gets a recommendation from me.


